Handling Files
Latenode supports two ways of working with files in scenarios:
- No-code nodes: you pass a file reference from one node to another.
- JavaScript node: you read/modify/create a file in code and return it back as a file output.
Passing files between no-code nodes
When a node outputs a file, it usually contains a file object with fields like content (internal path/reference), filename, extension, and more.
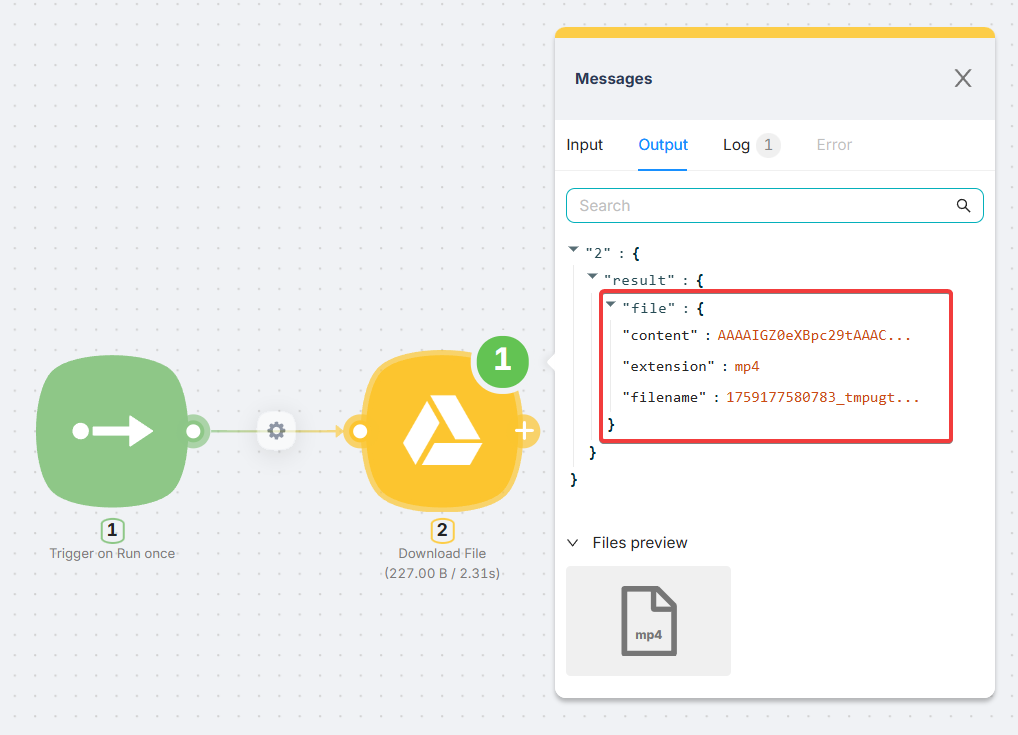
Typical mapping in receiving nodes
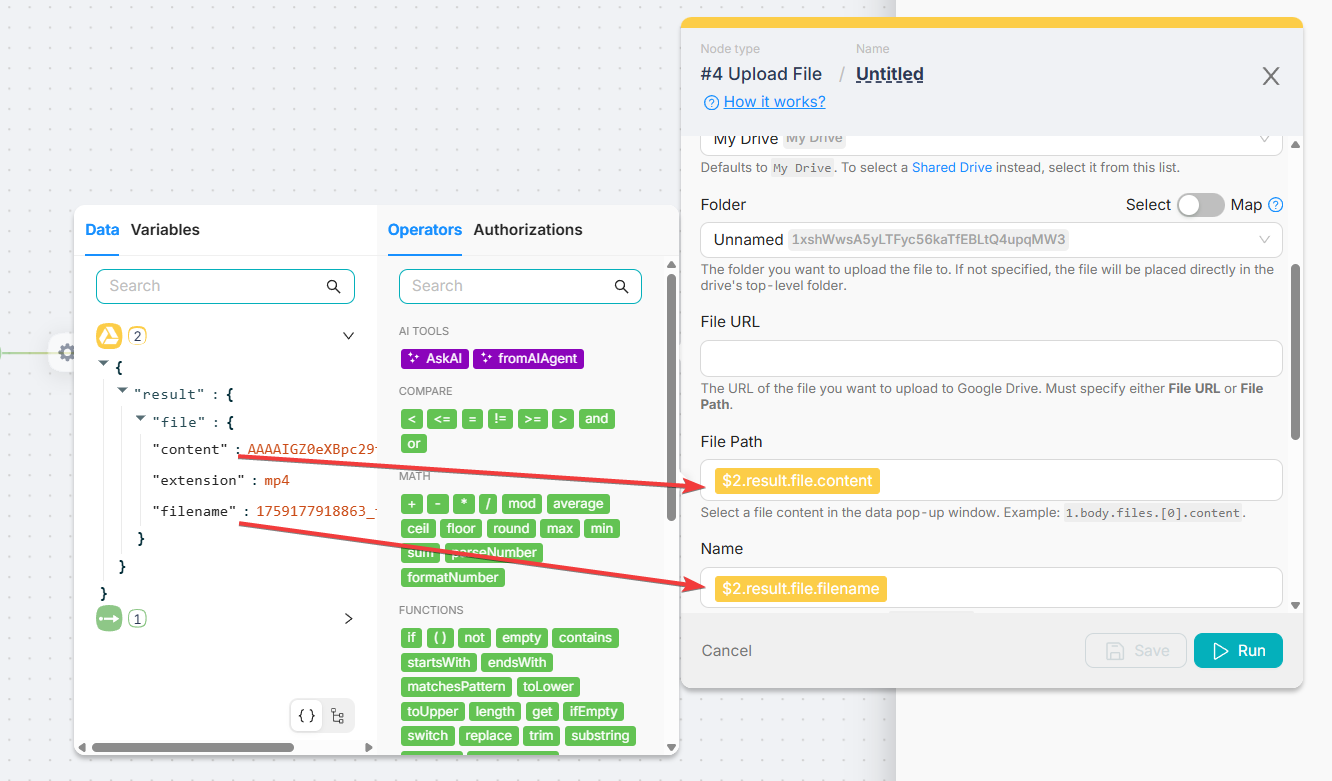
Most nodes either accept the whole file object or ask for specific fields (for example, File Path and Name). Use the helper widget to insert the values from previous nodes.
| Receiving node field | What to map | Example |
|---|---|---|
| File Path / File Content | File reference/path | {{$2.result.file.content}} |
| Name | File name | {{$2.result.file.filename}} |
| Extension (optional) | File extension | {{$2.result.file.extension}} |
Working with files in the JavaScript node
If you need to read, transform, or generate a file in code, you must work with a file path and Node.js fs.
Step 1: Get the temporary file path
Use the templated data accessor to pull the file path from a previous node (example: Node 2).
const contentFilePath = data["{{2.result.file.content}}"];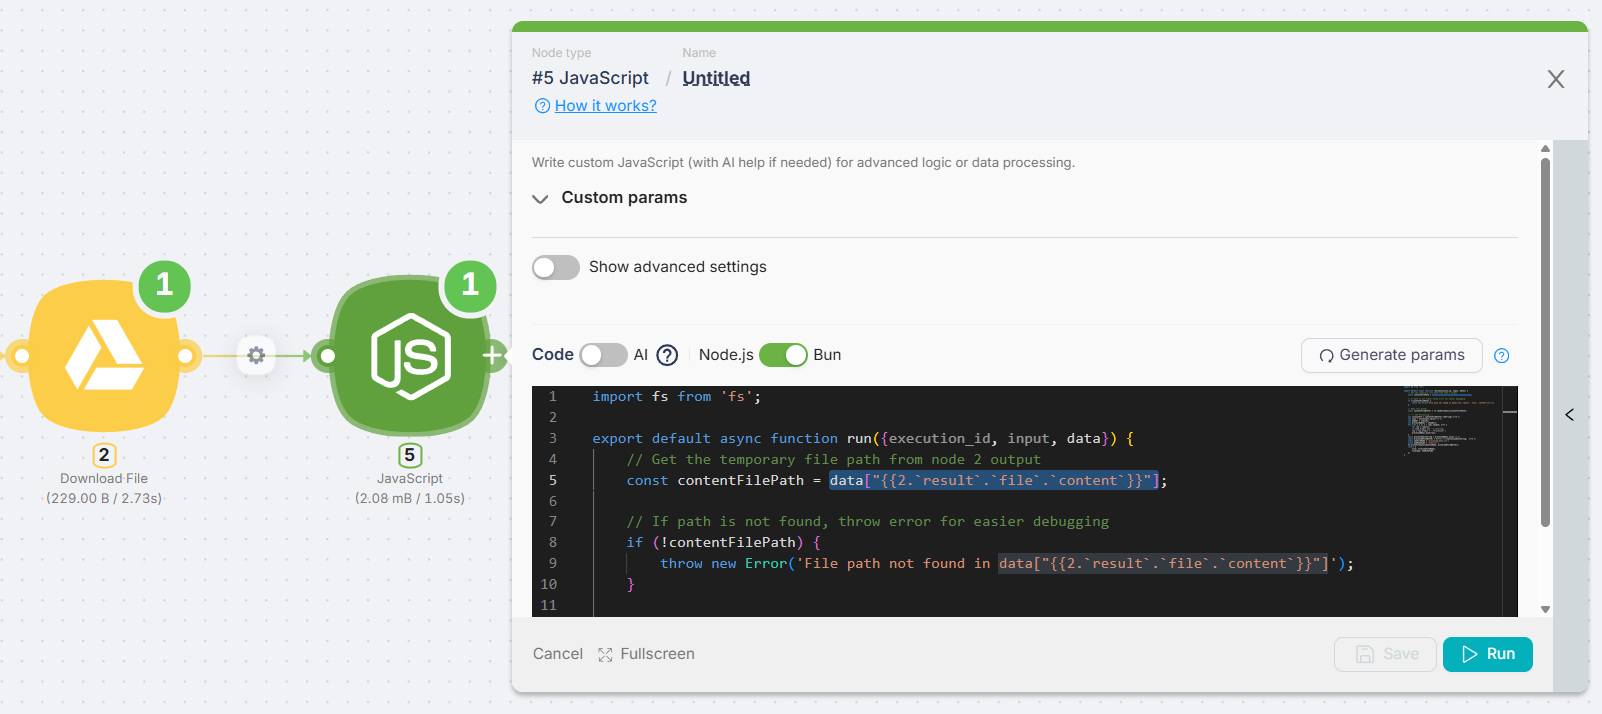
Step 2: Read/modify the file (Buffer)
Read the file from the path, perform your transformation, and build a new Buffer (or write bytes directly).
Step 3: Write and return the file
Write the output file to the temporary filesystem and return it using the file() helper so other nodes can consume it.
Important
Do not return the raw path from data[...] as your final output. Always follow: get path > read > modify > write > return file(...).
Tip: Ask the AI agent to return a binary file
The AI agent inside the JavaScript node can generate code that returns binary files (images, PDFs, CSVs, videos, etc.) out of the box. You can explicitly ask it to:
- Read a file from a specific node output (for example, "Node 2").
- Process it (convert, resize, compress, parse, etc.).
- Return the result as a file output using
file()and a correctfileType.
Example prompt you can paste into the AI chat in the JavaScript node:
Read the file from Node 2 output (
result.file.content), convert it to PDF, and return it as a binary file output with the correct MIME type.
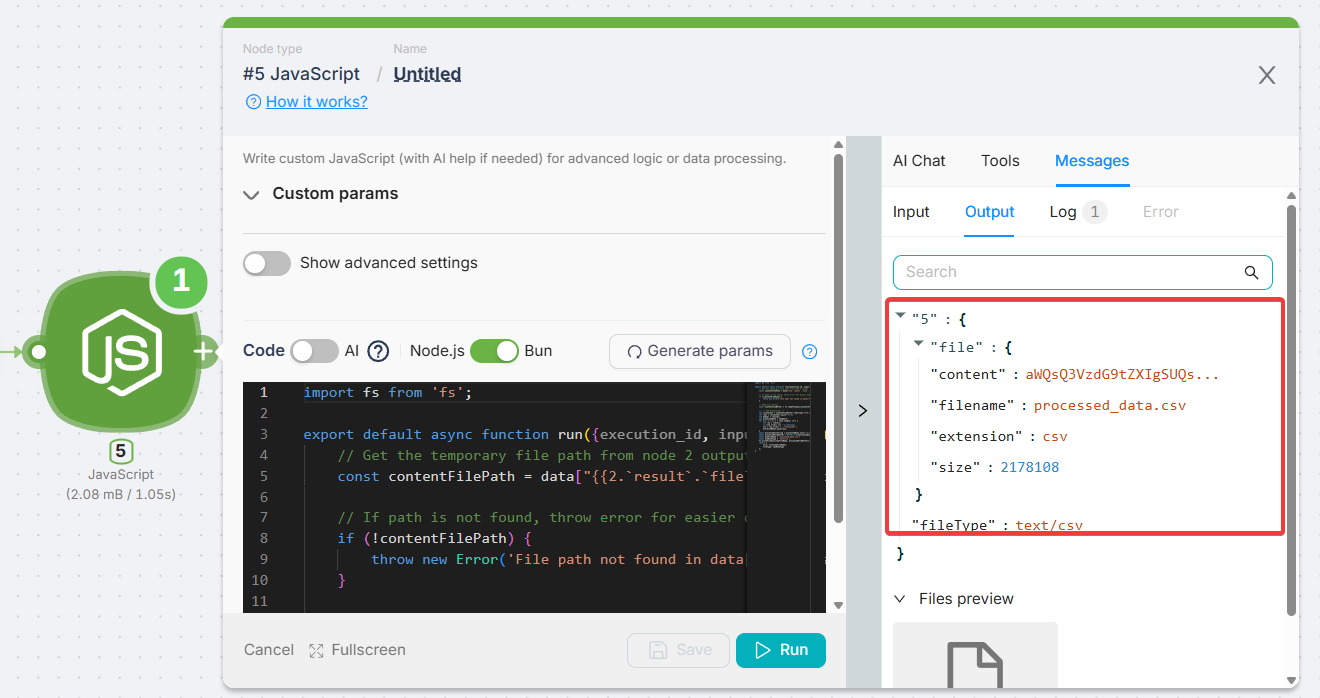
Complete example: Read > Modify > Write > Return (CSV)
import fs from 'fs';

export default async function run({ data }) {
  // 1) Get the temporary file path from Node 2 output
  const contentFilePath = data["{{2.result.file.content}}"];

  if (!contentFilePath) {
    throw new Error(
      'File path not found. Check that Node 2 outputs result.file.content and insert it via the helper widget.'
    );
  }

  // 2) Read file as a Buffer
  const contentFileBuffer = fs.readFileSync(contentFilePath);

  // 3) Modify (example: add ',"Processed"' column to each CSV row)
  const csvContent = contentFileBuffer.toString('utf8');
  const rows = csvContent.split('\n');

  const header = rows[0] ?? '';
  const processedRows = [header];

  for (let i = 1; i < rows.length; i++) {
    const row = rows[i];
    if (!row || row.trim() === '') continue;
    processedRows.push(`${row.trim()},"Processed"`);
  }

  const processedCsvString = processedRows.join('\n');
  const processedFileBuffer = Buffer.from(processedCsvString, 'utf8');

  // 4) Write and return as a file output
  const newFileName = 'processed_data.csv';
  fs.writeFileSync(newFileName, processedFileBuffer);

  return {
    file: file(newFileName),
    fileType: 'text/csv',
  };
}Iterating
Iterating over data in scenarios: Iterator node, cycle connector, and after-all-iterations connector.
Operators Basics
Where operators can be used (any fields) and how they work in routes (TRUE/FALSE, fallback, debugging).
Need Help? Ask the community
If something on this page is missing or unclear, post on the Latenode community forum. Our team and other users usually reply quickly.