Your first scenario in 15 minutes
Here is a practical automation: every morning you get an email digest of fresh news on a topic you care about.
What you will have:
- AI gathers the latest news for your topic (for example, "AI and startups")
- It turns them into a short digest with the main events
- It emails you every day at 9:00
Time: 15 minutes
Level: Beginner
You need: A Latenode account and a Gmail inbox
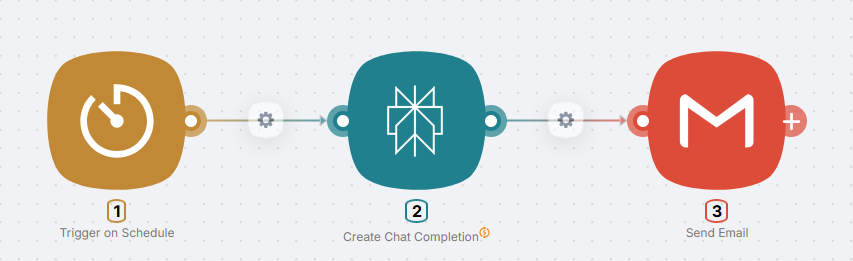
How it works
Every day at 9:00, a schedule trigger starts the scenario. Perplexity AI runs your prompt, finds fresh news, and returns a digest. Gmail sends that text to your email.

Step 1: Create a scenario
-
Open Latenode and click Create scenario (or New Scenario).
-
Give the scenario a clear name and optional description, for example "AI news digest".
-
Click Save (disk icon or Save button).
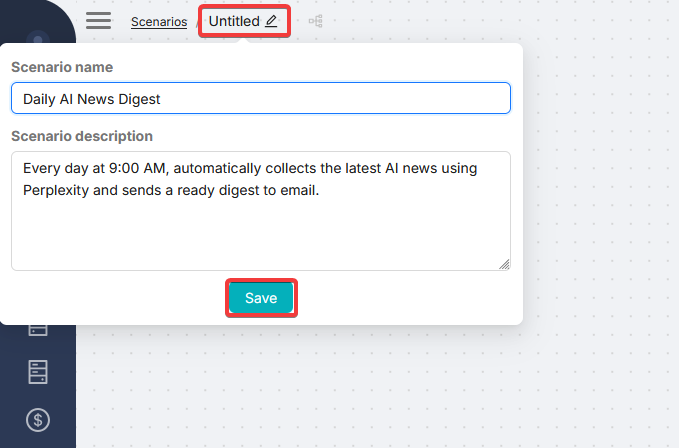
Use clear scenario names so you can find them later when you have many automations.
Step 2: Add a trigger (schedule)
The trigger is what starts the scenario. Here we use a schedule.
Add the Trigger on Schedule node
-
Click Add node (Add Node in the center of the canvas).
-
Search for Schedule.
-
Choose Trigger on Schedule under Triggers.
Configure the schedule
-
Click the Trigger on Schedule node on the canvas to open its settings.
-
Set when the scenario should run:
- In the top row of the panel, pick period and time from the dropdowns, for example every day at 9:00
- Or set a schedule with a cron expression in Schedule cron (format is hinted under the field in the UI)
- In Schedule timezone, choose your time zone
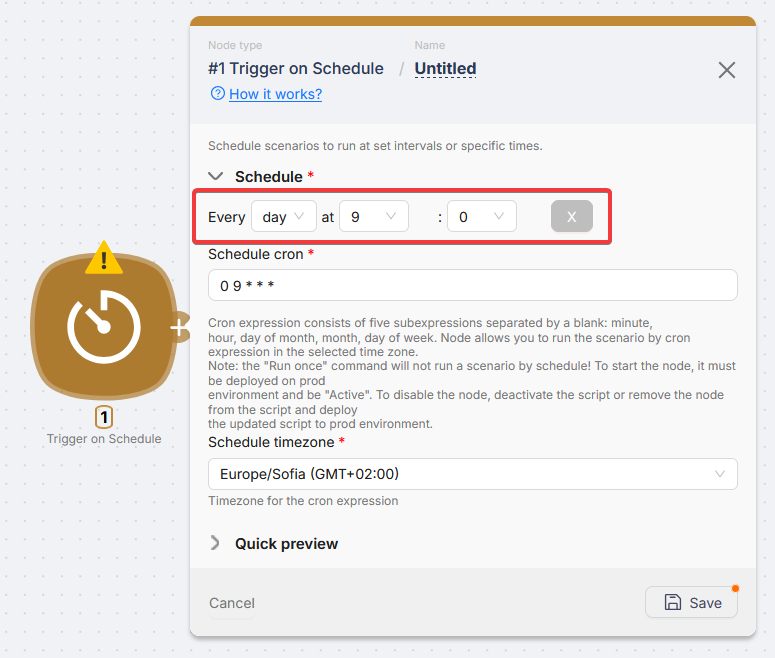
- Click Save at the bottom of the panel.
Step 3: Add Perplexity AI
Next we add AI that collects the news.
Add the node
-
Click the right connector on Trigger on Schedule. You do not need to drag the line anywhere: the node picker opens right away.
-
Open the Plug and Play folder (nodes that do not require your API keys).
-
Select Perplexity AI.
Configure Perplexity AI
-
Click the Perplexity AI node to open settings.
-
Fill in the fields:
Model: leave the default as is.
Prompt: paste this text:
Collect fresh news from the last 24 hours on the topic "artificial intelligence and startups".

Build a short digest:
- 5 to 7 main stories
- Each story: headline plus 1 to 2 sentences
- End with a brief takeaway

Format: plain text, no markdown.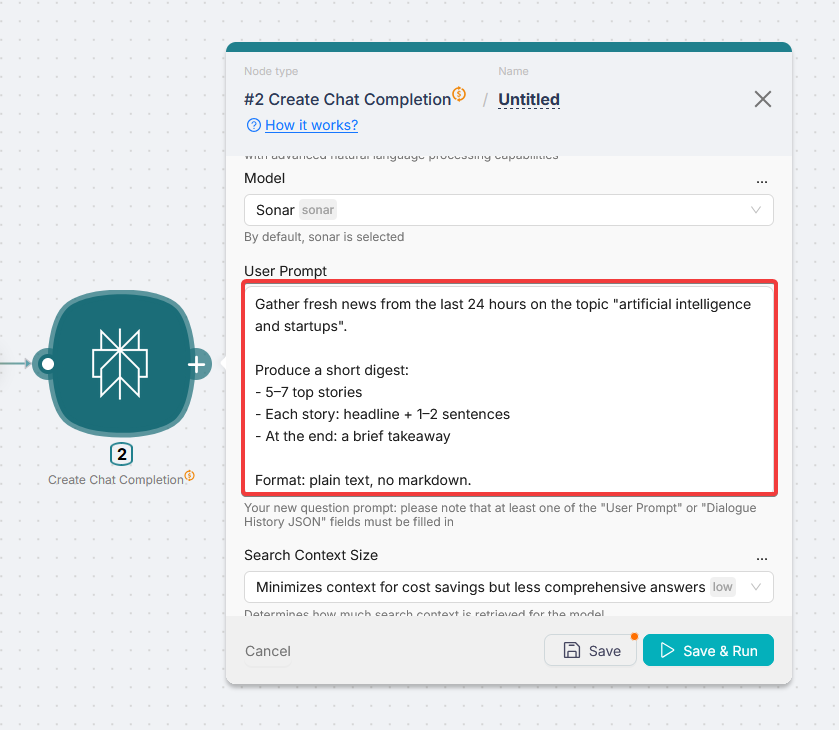
- Click Save.
Change the topic in the prompt to whatever you want: crypto, marketing, real estate, sports, and so on.
Test Perplexity AI
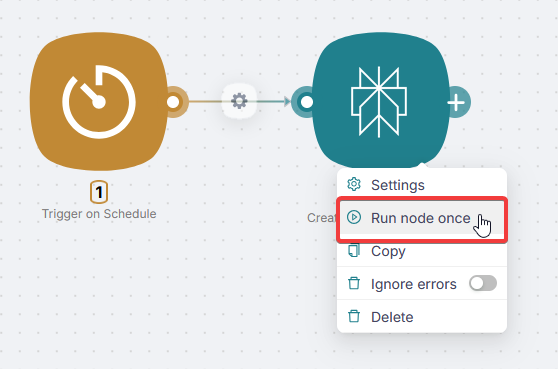
Now run and test this node on its own.
- Right-click Perplexity AI and choose Run Node Once.
Or, with the node settings panel open, click Save and run.
-
Wait for the run to finish (about 5 to 10 seconds for this prompt; longer if the request is heavy). After a successful run, a green status dot appears on the node.
-
After some runs, nodes may show a preview of the most useful output fields. You can configure these previews for any node later.
- To see full run data, click the green dot (success). The panel shows input, output, and logs. For the digest text, follow the path
message→content→message.
- If the text is not what you want, edit the prompt and run Run Node Once again until you are happy.
Next we send this digest to your inbox.
Step 4: Add Gmail
We need an email node that sends the digest.
Add the node on the canvas
-
Click the plus next to Perplexity AI.
-
Choose Gmail from the list.
Create authorization (Gmail)
-
Open the Gmail node you added.
-
Click Create Authorization.
-
Choose OAuth (Google).
-
Name the connection so you can tell it apart from others.
-
In the browser window, grant all requested permissions.
After authorization completes, all Gmail fields appear in the node panel.
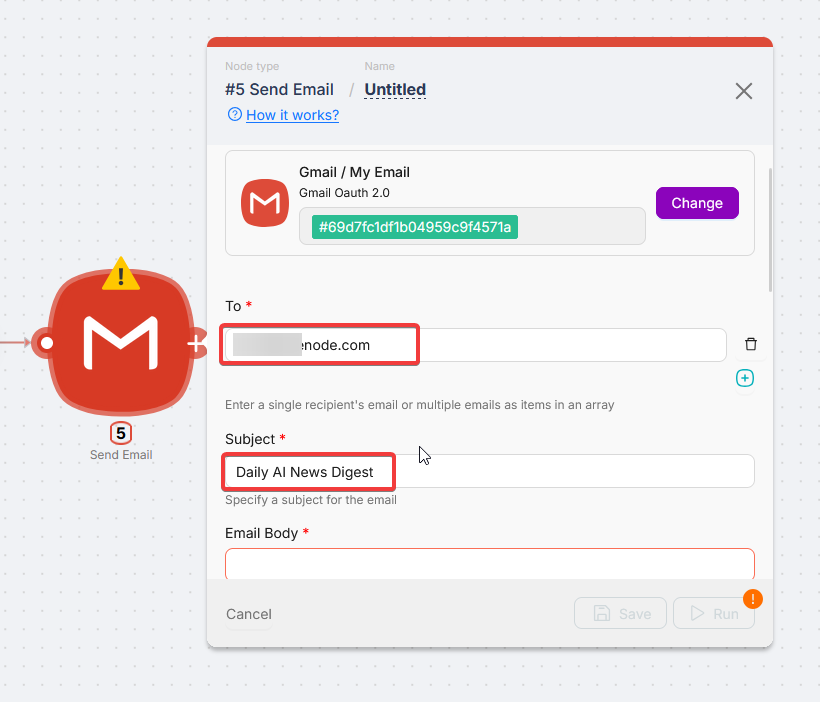
Email fields
-
In To, enter your email so the digest lands in your inbox.
-
In Subject, set the subject line. In this example:
Daily AI News Digest.
Body from Perplexity output
In Body, insert the variable that holds the digest from Perplexity AI.
Clicking any field in the node settings opens a panel with a Data tab: data from all upstream nodes connected to this node on the canvas.
-
Click Body to open the data picker.
-
On Data, you see previous nodes in the chain: here Trigger on Schedule and Perplexity AI.
-
Click a node to expand it and see its output fields.
-
Pick the value you need; it is inserted into Body. For the digest text, use output from Perplexity AI.
-
Click Save on Gmail.
Step 5: Test the full chain
If you Run Node Once on Gmail alone, it still sends mail the same way we tested Perplexity AI in step 3.
Now test the whole path: one Run once for the scenario runs every node in order.
- Click Run once for the scenario (full chain).
-
Wait until all nodes finish without errors and show green status.
-
Check your inbox: you should see the digest (in this example, subject Daily AI News Digest).

If something fails: on the failing node, look for a red status dot and open the node. The error text usually states the cause.
Typical issues here: a required Gmail field left empty (Subject or To), incomplete OAuth scopes, or an empty Prompt on Perplexity.
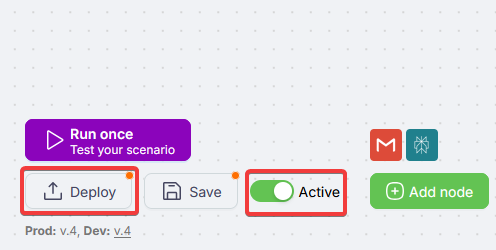
Step 6: Publish the scenario
The scenario already works end to end with Run once. To let it run on its own on the schedule, use the footer of the editor:
-
Turn the scenario Active (Active toggle).
-
Click Deploy: the scenario moves to Production and will run on Trigger on Schedule.
From now on, you get the digest email every day at the time you set.
Done. The scenario runs in the background. You can close Latenode: the digest still arrives on schedule.
What you learned
You can now:
- Create scenarios
- Add schedule triggers (Trigger on Schedule)
- Add actions (Perplexity, Gmail)
- Connect nodes
- Pass data between nodes
- Test runs
- Publish and activate
How Latenode works
The basics of the Latenode automation platform: scenarios, triggers, and actions.
Your first AI agent in 30 minutes
Build a Telegram bot with AI and web search in 30 minutes - no code required
Need Help? Ask the community
If something on this page is missing or unclear, post on the Latenode community forum. Our team and other users usually reply quickly.