How to Build a Scenario
A scenario is a chain of nodes on the canvas. You add nodes, connect them with lines, and data flows left to right from node to node. This page explains the mechanics: how to connect nodes, how they pass data to each other, and how to build efficiently.
Adding and connecting nodes
To add the first node, click Add node in the center of the empty canvas or use the + button in the toolbar.
To add the next node and connect it to the previous one in one step, click the connector (the arrow on the right side of the node). The node picker opens with the connection already prepared: the node you choose will be added and wired up immediately.
Or click Add node in the bottom panel - the node will be added to the canvas without connecting to any existing node.
Nodes with free connectors snap together: drag one toward another and the route is created automatically.
You can also draw a route manually from one node to another. If a route already exists, there is no need to delete and recreate it: drag its start or end to a different node and it will reconnect.
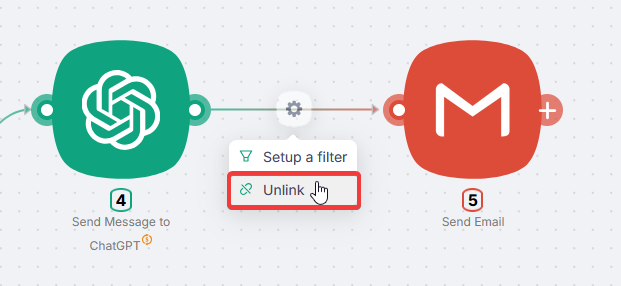
To delete a route, right-click it and choose Delete.
Getting the first data into the scenario
If your scenario starts with an app trigger (Gmail, Telegram, Slack, and so on), you need data from it before you can configure the next nodes. There are two ways.
Option 1: run only the trigger. Hover over the trigger node, right-click it, and choose Run Node Once. The node tries to fetch the latest event from the connected service. In some cases the API returns a sample (mock) message - that is enough to see the data structure and start configuring the next nodes.
Option 2: run the whole scenario. Click Run Once in the bottom-left menu - the scenario runs in full and waits for a real event in the trigger. As soon as you manually create that event (send an email, a message, and so on), the trigger catches it and data flows through the whole chain.
You can also run any action node in the chain manually at any point to get data from it, regardless of the trigger.
We recommend starting with Option 1: run nodes one by one and check the data at each step.
Viewing node execution data
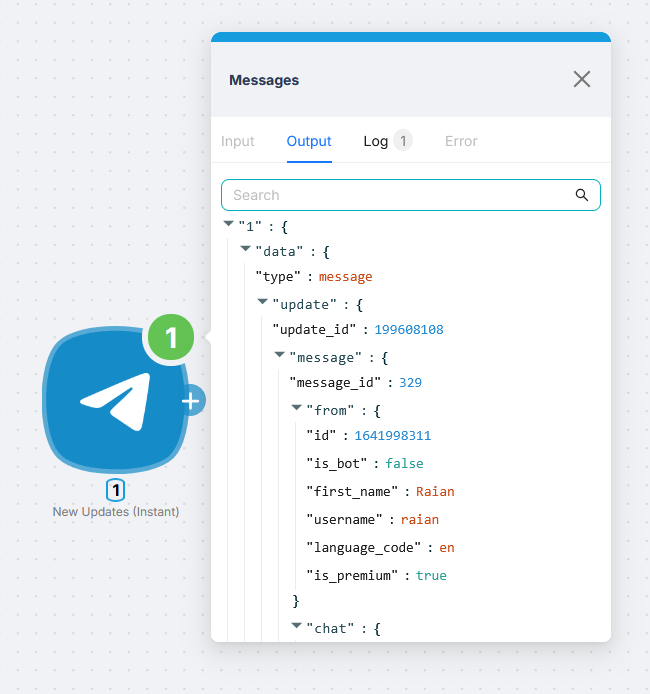
After a node runs, a green dot appears next to it. Click it to open a panel with the Input, Output, Log, and Error tabs.
The most useful tab is Output: it contains all the data the service returned. These are the values you will use in the next nodes. For example, for a Telegram trigger you will already see the sender ID, chat ID, message text, and other fields there.
Passing data to the next nodes
Say the trigger received a Telegram message and you want to pass its text to ChatGPT. Click the field in the target node - a panel opens with a DATA tab listing variables from all upstream nodes in the chain. Type the prompt text, expand the upstream node you need, and click the variable - it is inserted at the cursor position.
The DATA tab shows variables from all upstream nodes in the chain, not only the immediately previous one. You can pull data from any node to the left in the chain.
For a variable to appear in DATA, the upstream node must have been run at least once. If DATA is empty, run the upstream node with Run Node Once first.
If you run a node that has variables from unrun upstream nodes in its fields, those variables will arrive as null. This can cause an error or an unexpected result. Always run nodes in order: first the one providing the data, then the one consuming it.
In the example below: we add a Telegram node to send a reply, map the Chat ID field to a variable from the trigger, and set the text field to the ChatGPT response.
Fields marked with a red asterisk are required. Without them the node will throw an error. Fill those in first.
Field names usually match the data you need. If the field is called Chat ID, map the chat_id value from the upstream node. This applies to most standard identifiers: chat_id, user_id, request_id, and others. Look for a variable with the same name in DATA.
Build workflow
- Plan the scenario: decide which nodes you need and in what order.
- Add the required nodes to the canvas.
- Start with the first node: fill in the fields and run it - right-click → Run Node Once.
- Click the dot next to the finished node and check the output: did it return what you expected? If not, adjust the settings and run again.
- Configure the next node: map the data you need from upstream nodes via the DATA tab, then run it.
- Check its Output the same way as in step 4.
- Repeat steps 5-6 to the end of the chain.
If the data you need is not in DATA while configuring a node, you are probably missing an intermediate step - for example, an additional API call that fetches or creates the required data. Add it to the chain, run it, and the variables will appear in DATA.
Operators
Sometimes you need to transform data rather than just pass it along: format a date, build a string from several variables, get the length of a text. Operators handle this.
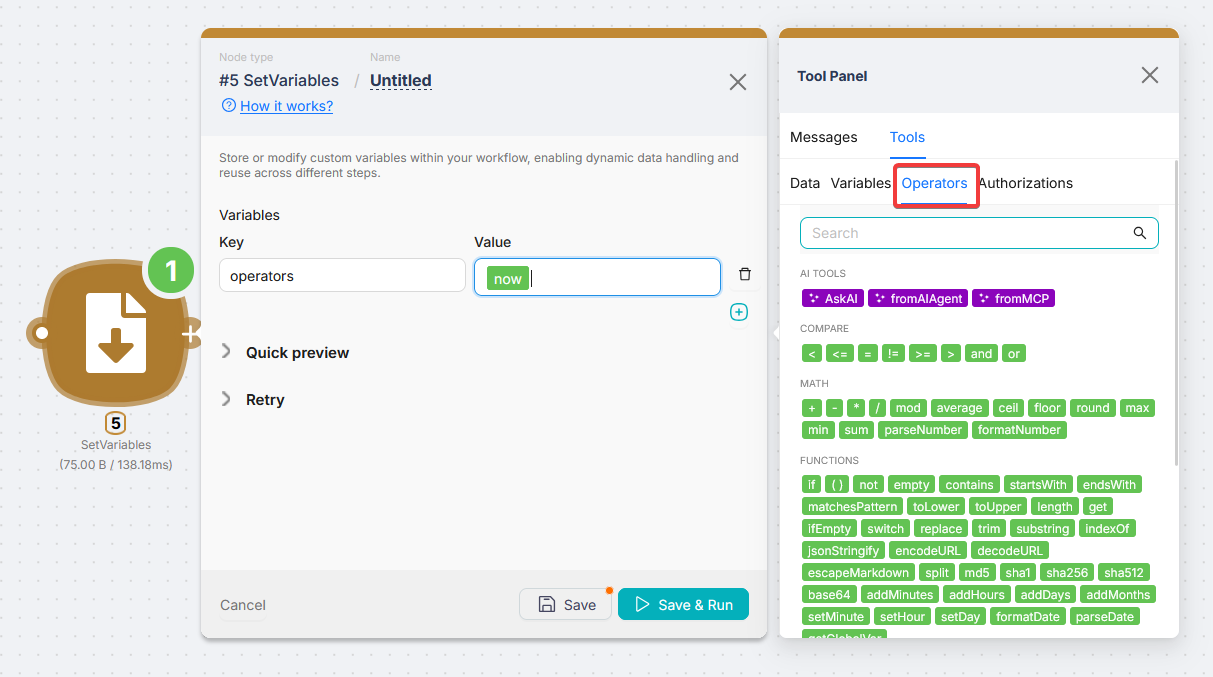
Click any node field and switch to the Operators tab, which sits next to Data. All operators are grouped by type: comparisons, math, string functions, dates, and arrays.
You can wrap both static text and variables from upstream nodes in an operator - the result is evaluated dynamically on each run. Here is what a field with several operators looks like and the output it produces:
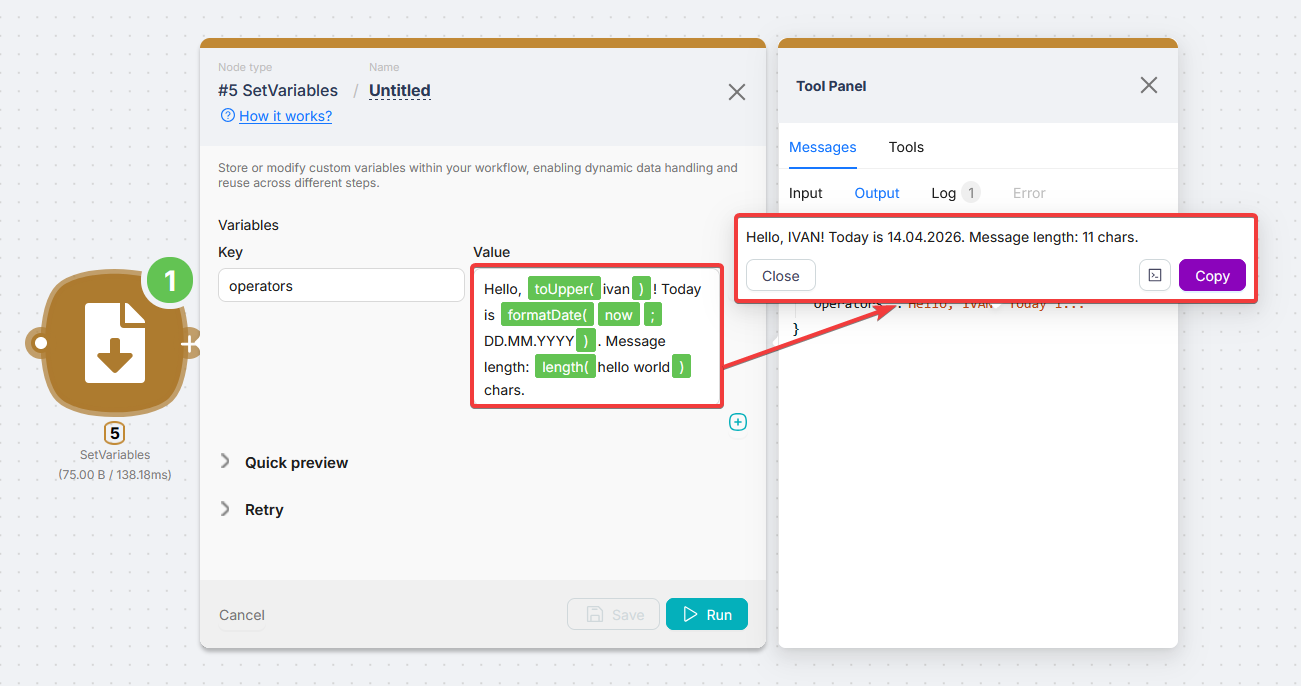
The values now, today, and timestamp are available in any field without running any nodes first.
Branching: filters and conditions
Operators are also used for filtering and routing: a condition on the route between nodes is a comparison operator that decides whether data flows along that branch.
Latenode does not have separate nodes for filtering and routing such as if, filter, split, or merge. All of this is configured directly on the routes between nodes.
A single node can have several outgoing routes. Each route can have a condition - the branch fires only if the condition is met. If the condition is not met, data does not flow along that route.
Click a route between two nodes to open the condition panel. In the example below there are two branches: one fires when amount is greater than 100, the other when it is less.
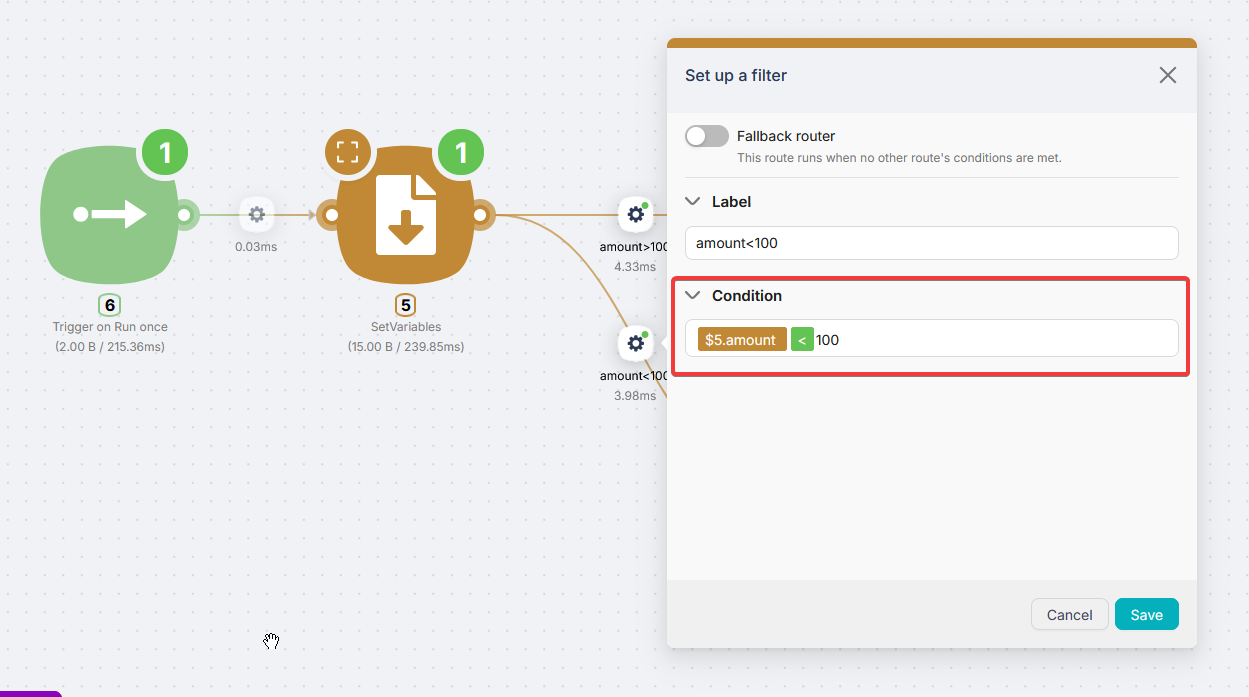
Here is how it works in practice: a value of 150 triggers the first branch, a value of 50 triggers the second.
If a route has no condition, data always flows along it. If a node has several routes without conditions, all branches run at the same time.
The full list of operators and examples: Operators reference.
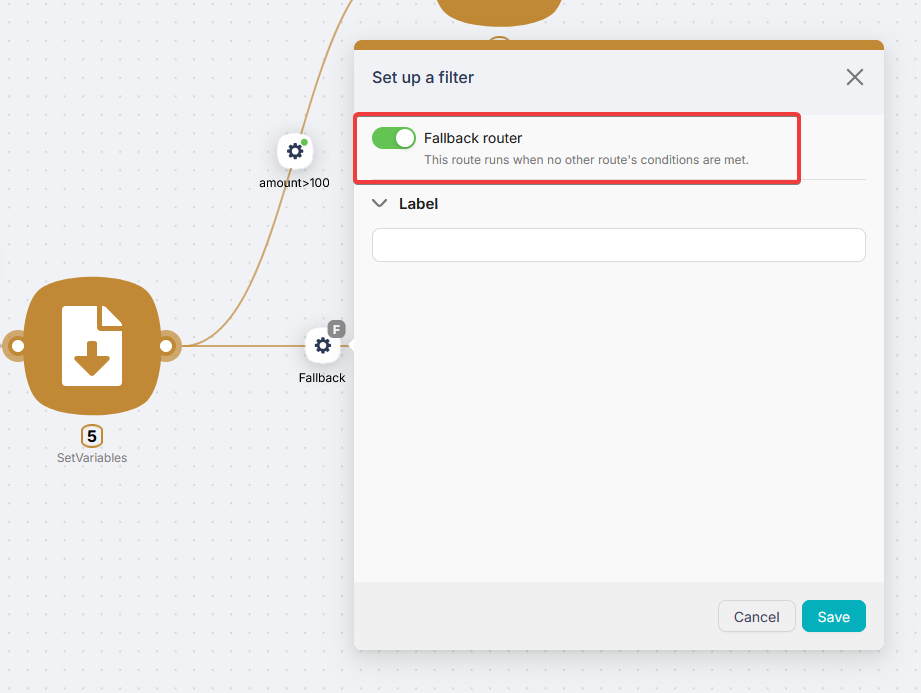
Fallback route. If none of the conditions on the outgoing routes are met, the fallback route fires - the "catch-all" branch. Enable it with the Fallback router toggle in the route settings.
What's next?
How to Plan a Scenario
What to think through before building an automation
If the app or action you need isn't available
How to connect any service via HTTP Request or JavaScript when there is no ready-made integration or a specific action is missing
Need Help? Ask the community
If something on this page is missing or unclear, post on the Latenode community forum. Our team and other users usually reply quickly.