App Authorization Instructions
Flutterflow
The Latenode platform facilitates interaction with apps created using the Flutterflow service through the Trigger on Webhook node.
Flutterflow provides intuitive tools for designing mobile app interfaces, enabling quick and efficient frontend development with minimal effort. Latenode can manage the backend logic.
Example Scenario: Generating Random Numbers for Display in Flutterflow
You can watch a training video here.
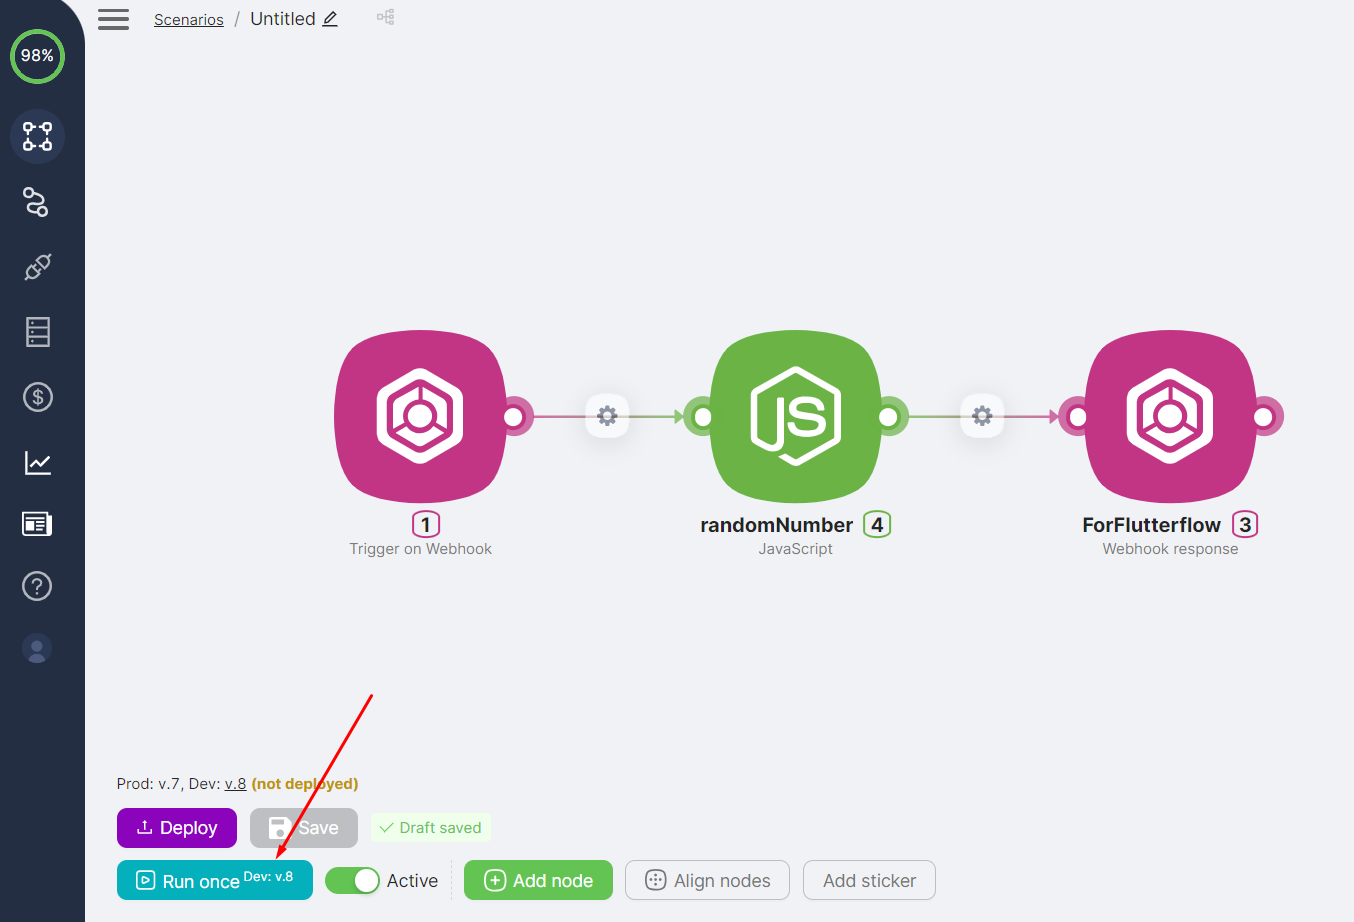
Creating a Latenode Scenario
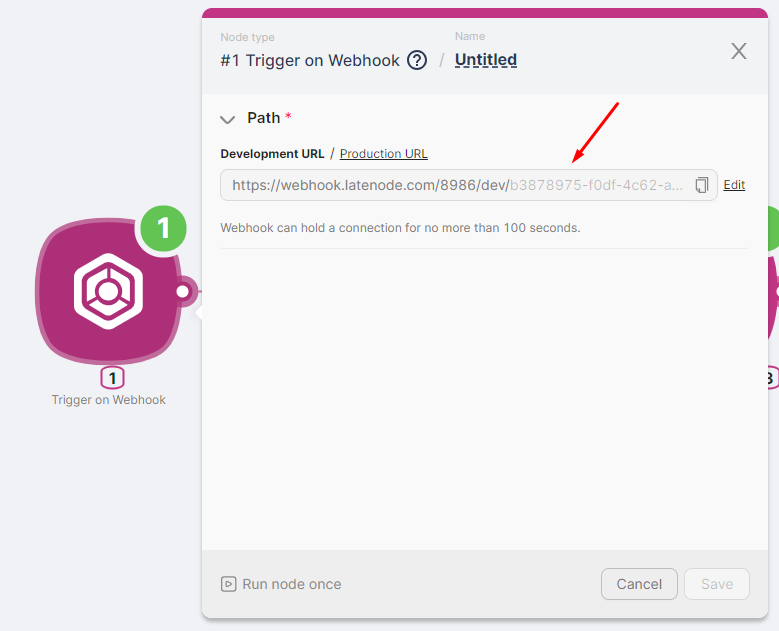
- Trigger on Webhook: Start the scenario with this node and save its URL for later use in Flutterflow.
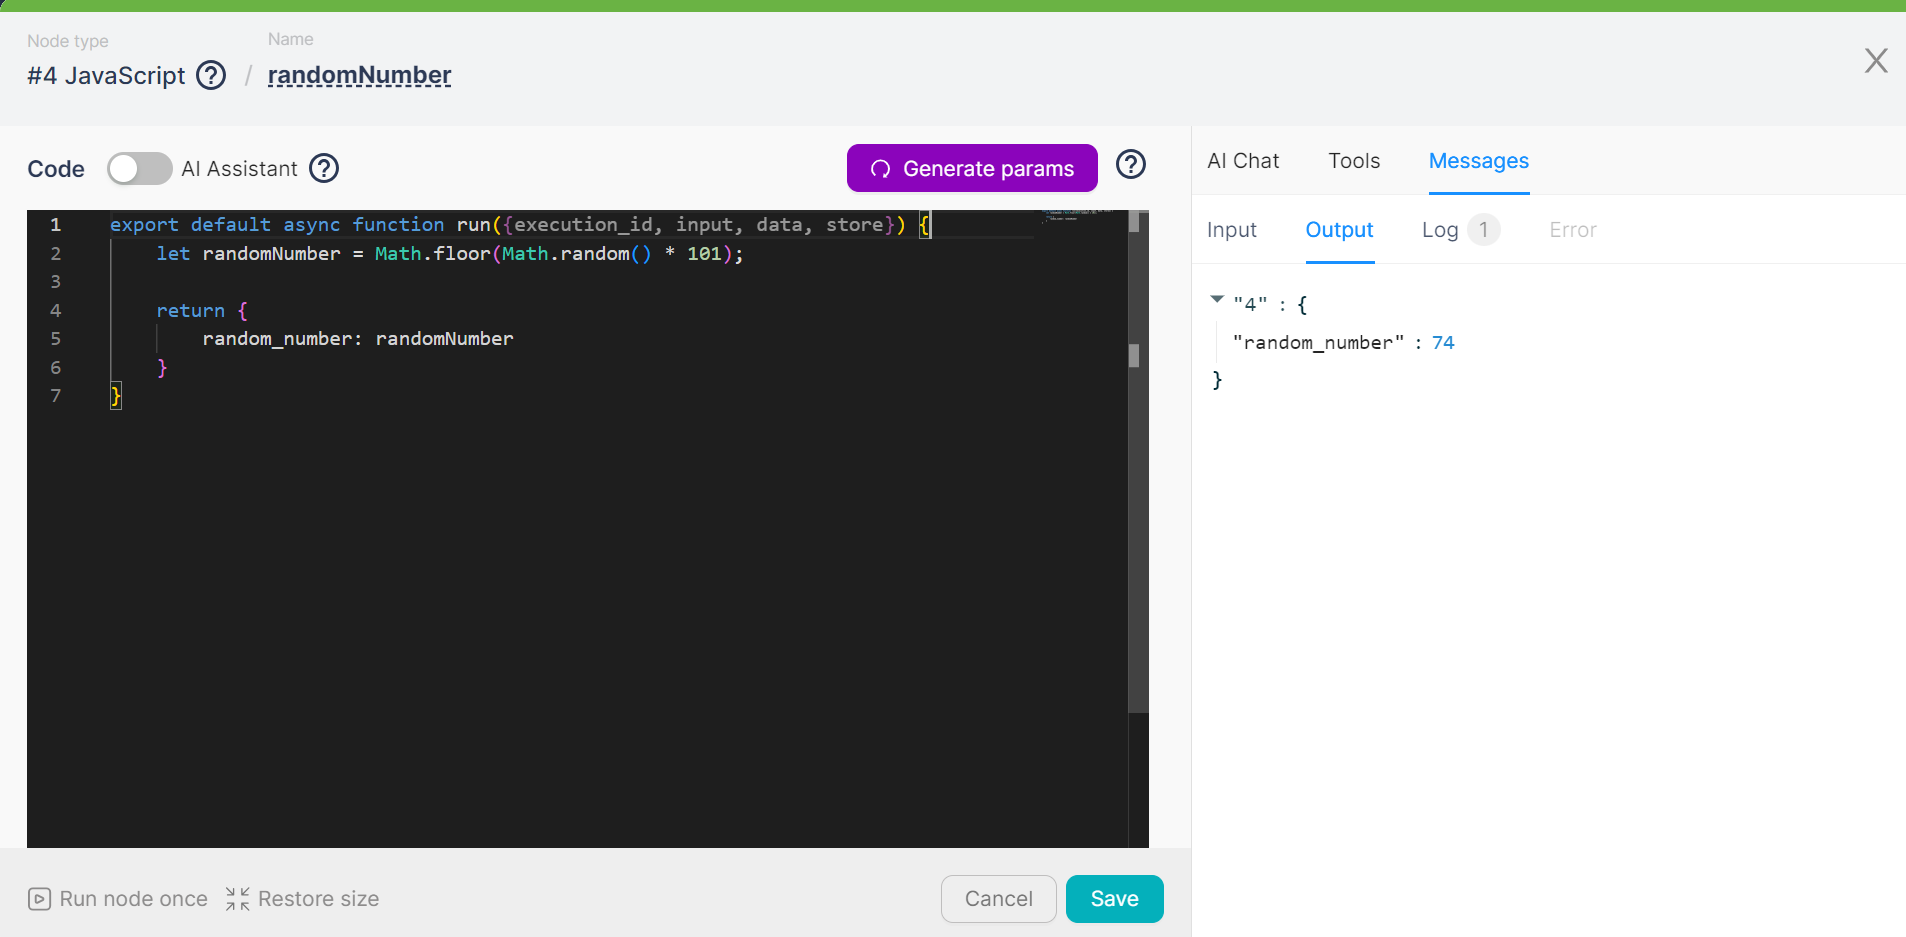
- JavaScript: Add a node with code to generate a random number.
export default async function run({execution_id, input, data, store}) {
    let randomNumber = Math.floor(Math.random() * 101);

    return {
        random_number: randomNumber
    }
}
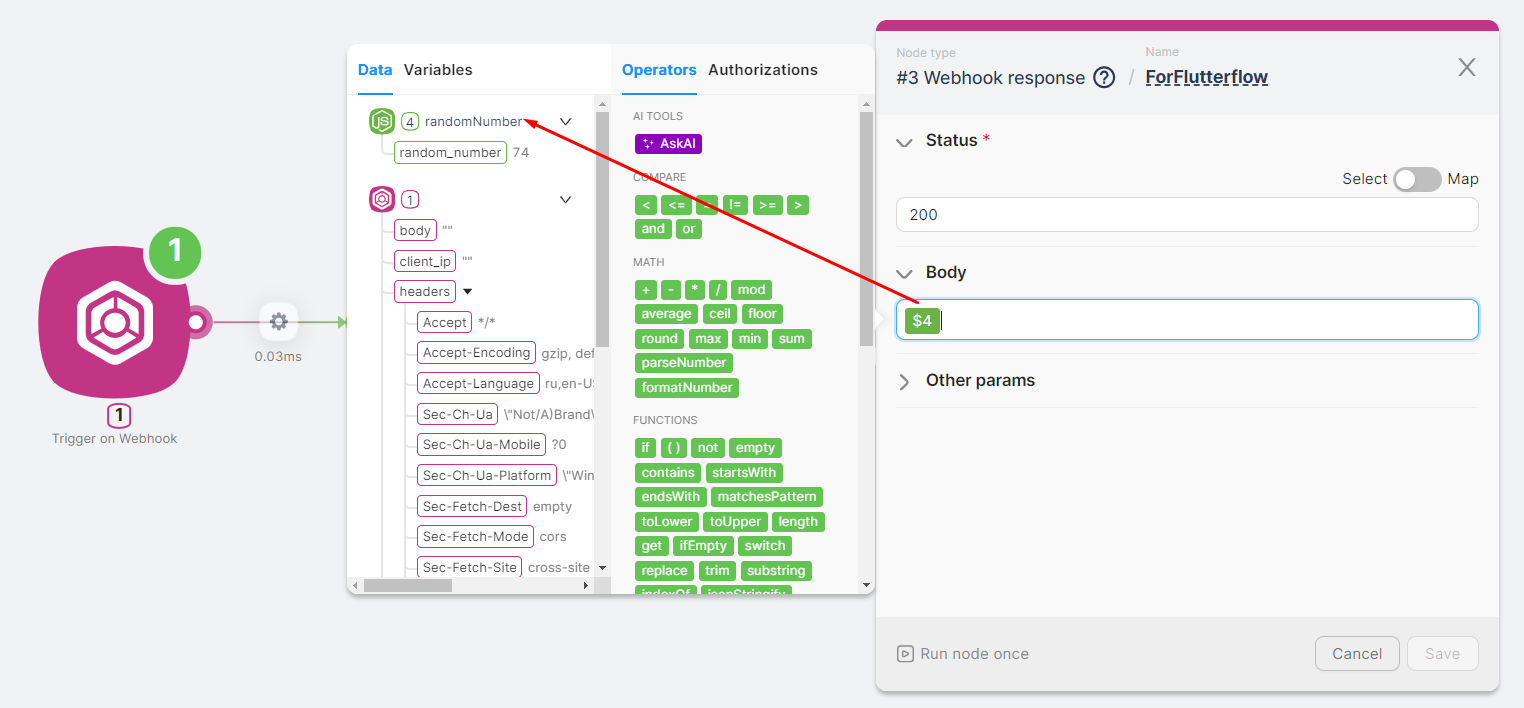
- Webhook Response: Use this node to send the scenario's result to Flutterflow.
Building the Form in Flutterflow
Sign Up: Register on Flutterflow.
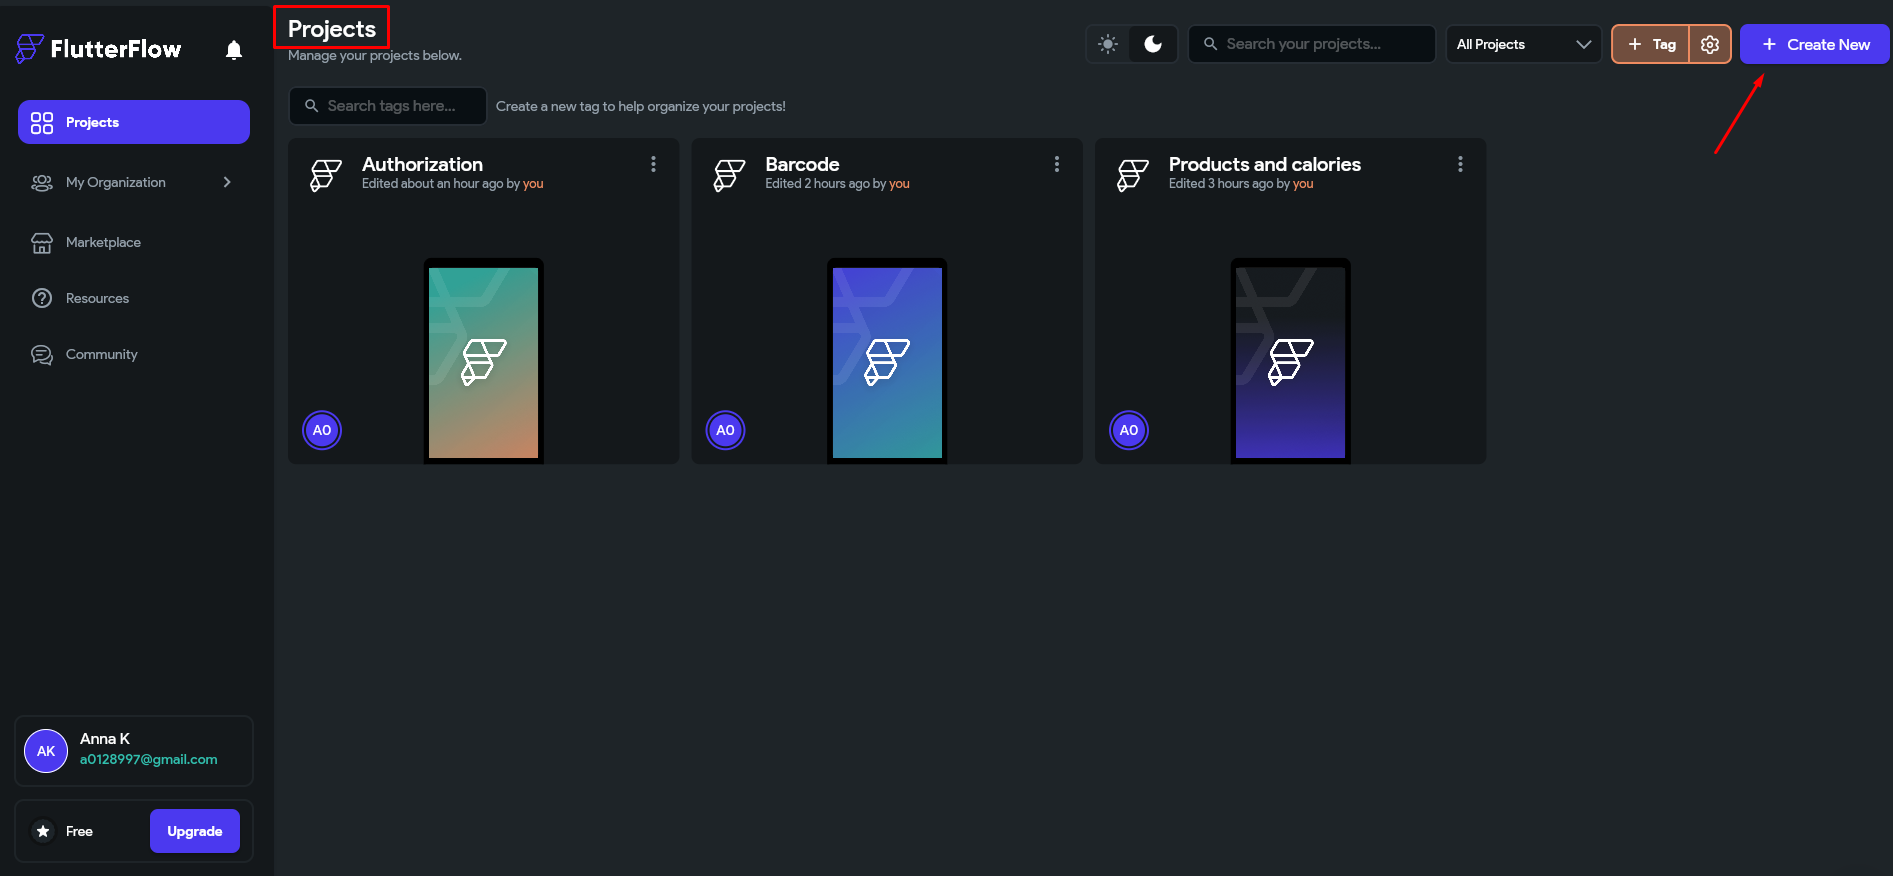
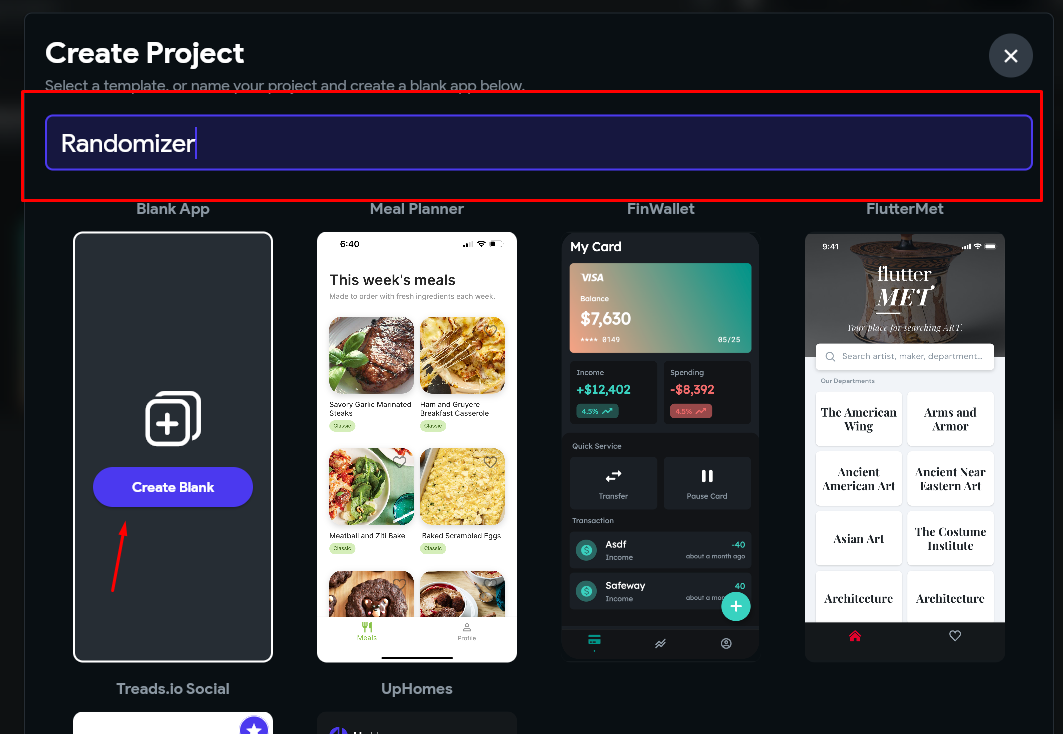
Create Project
- Go to the Projects page and click Create new.
- Name the new project and select Create Blank.
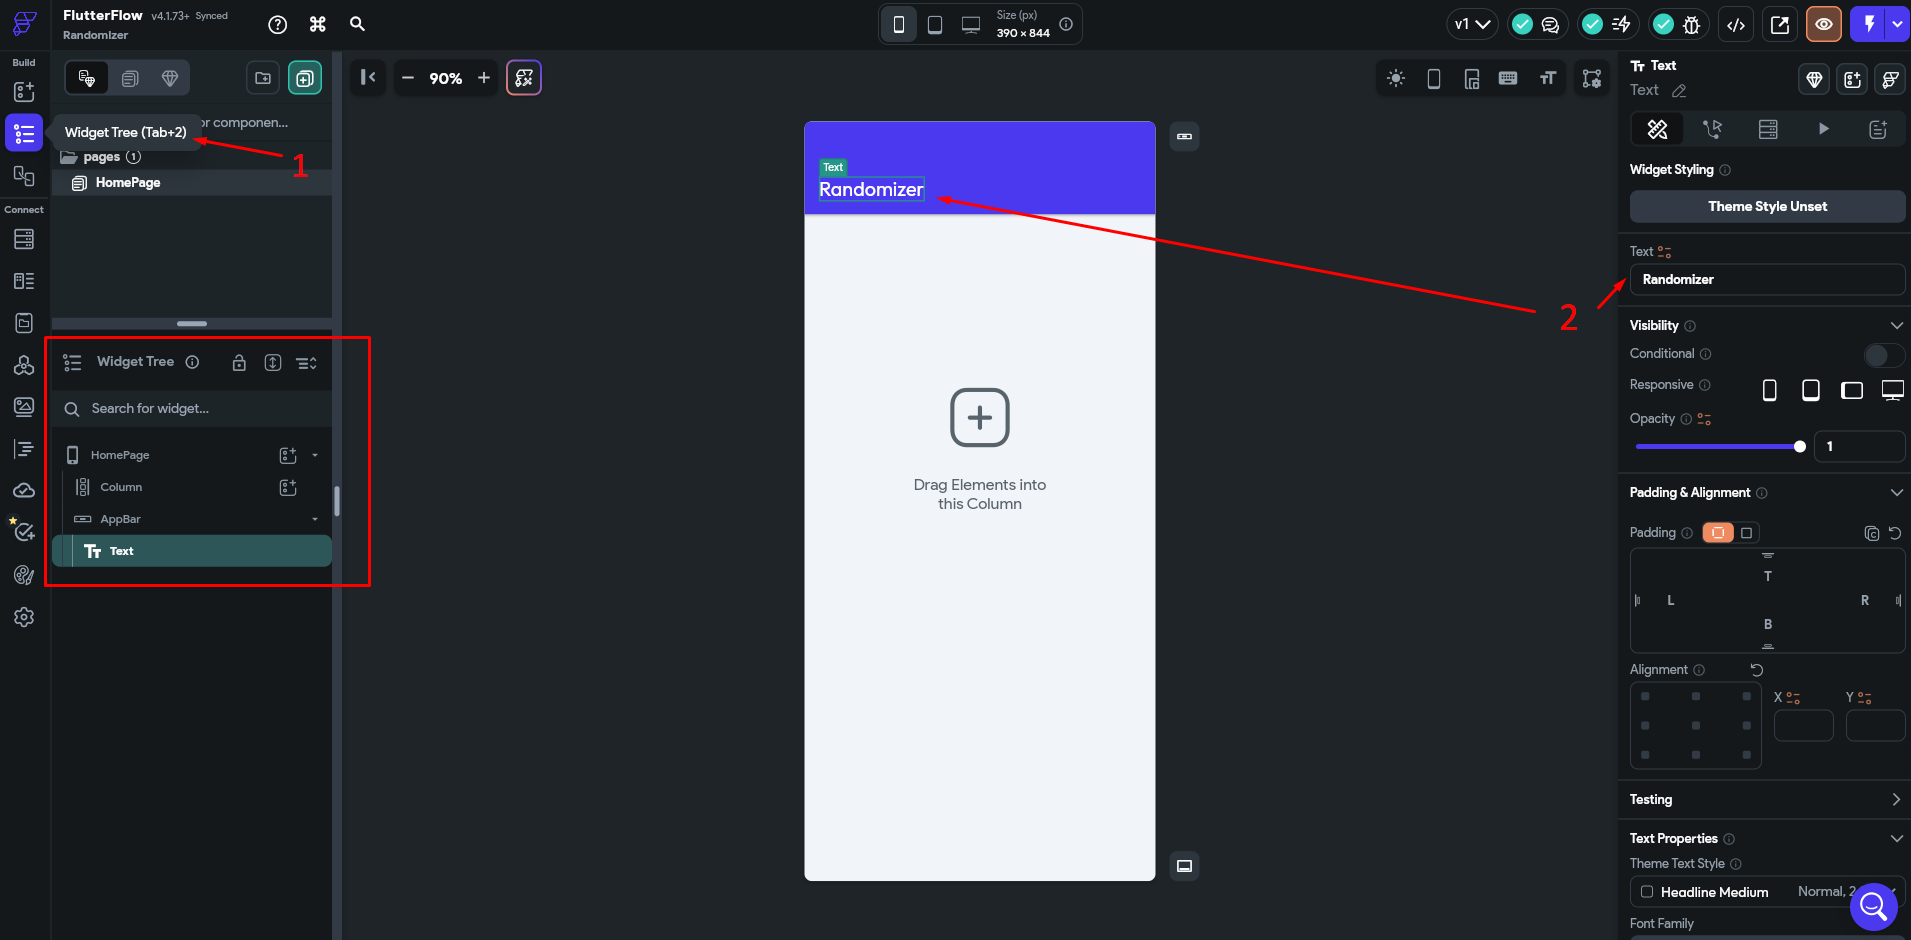
Interface Design
- In the Widget Tree (1) tab, view interface elements and update the text element (2) at the top.
- Add a TextField (2) to the Column (1) element.

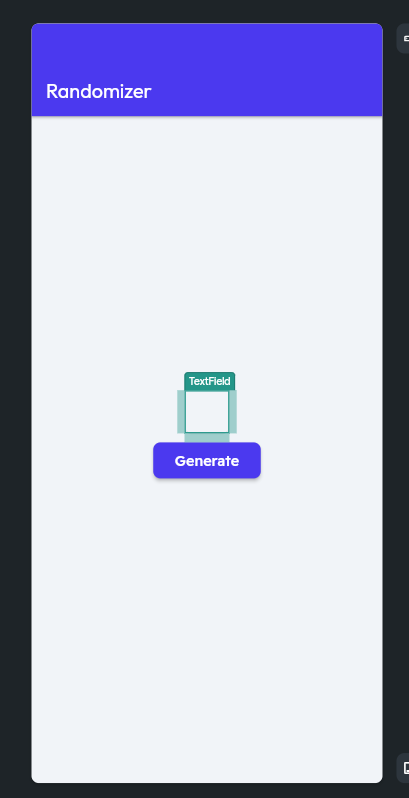
- Add a Button to the Column.
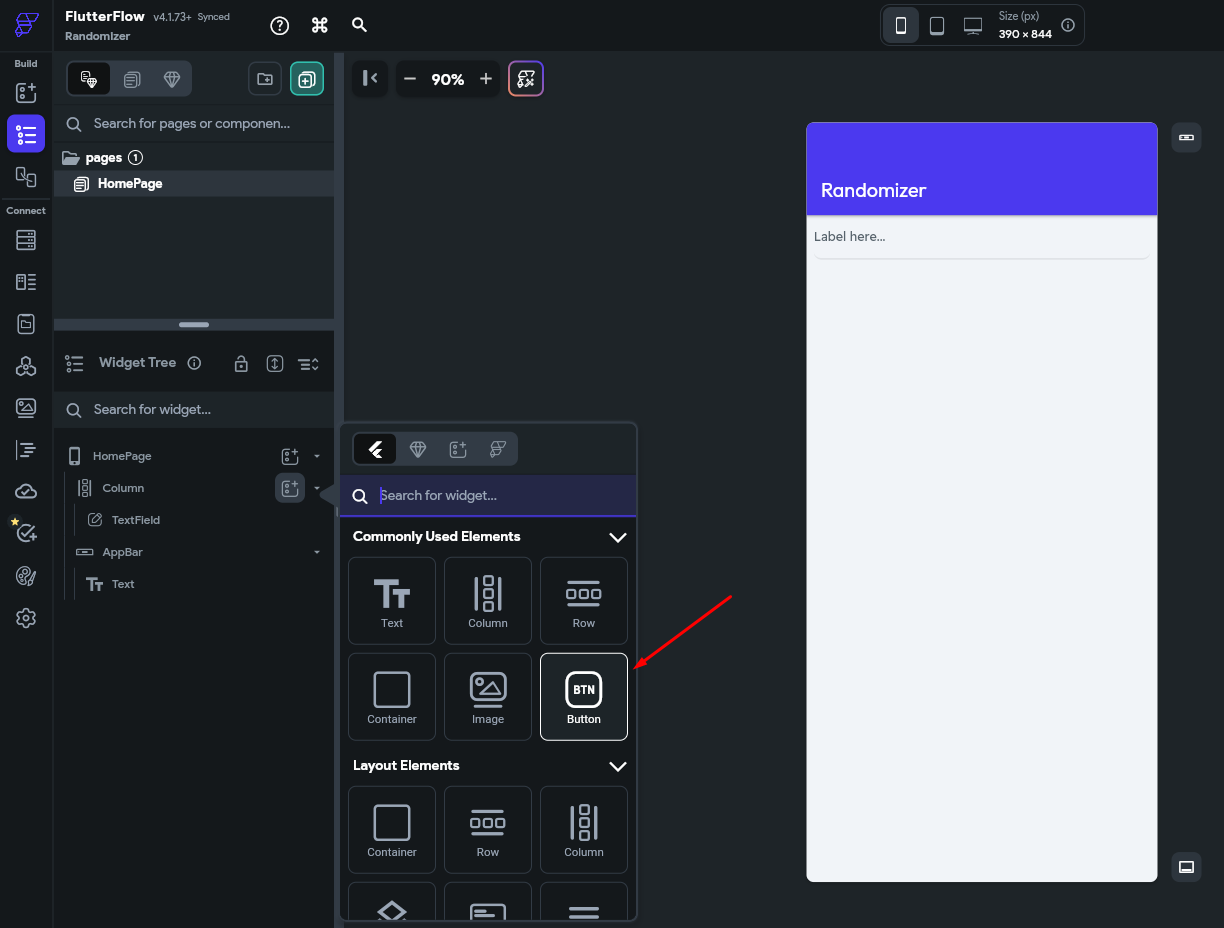
- Customize settings, align fields, and rename buttons as desired.
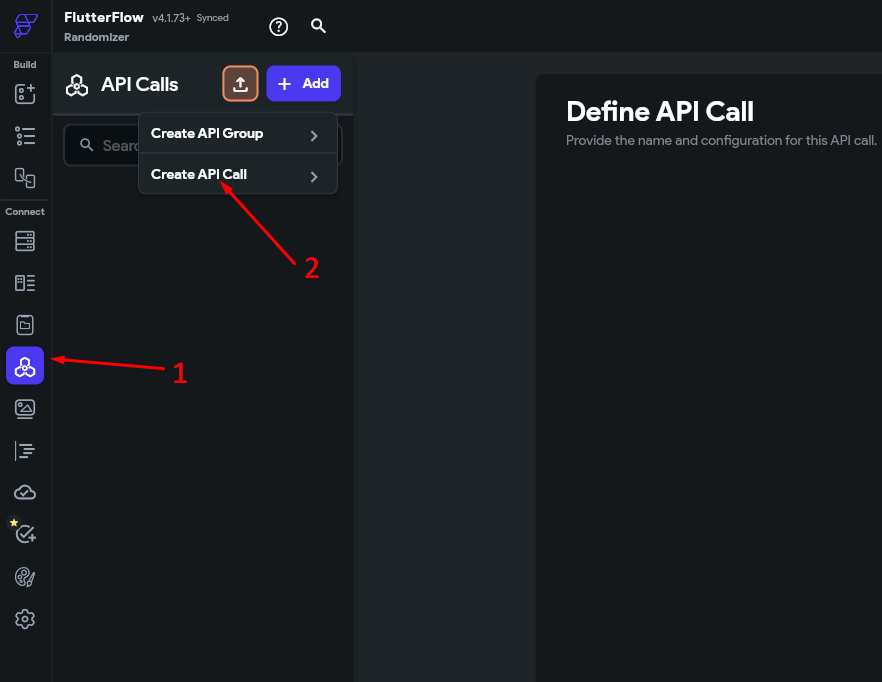
API Setup
- In the API Calls (1) tab, select Create API Call (2).
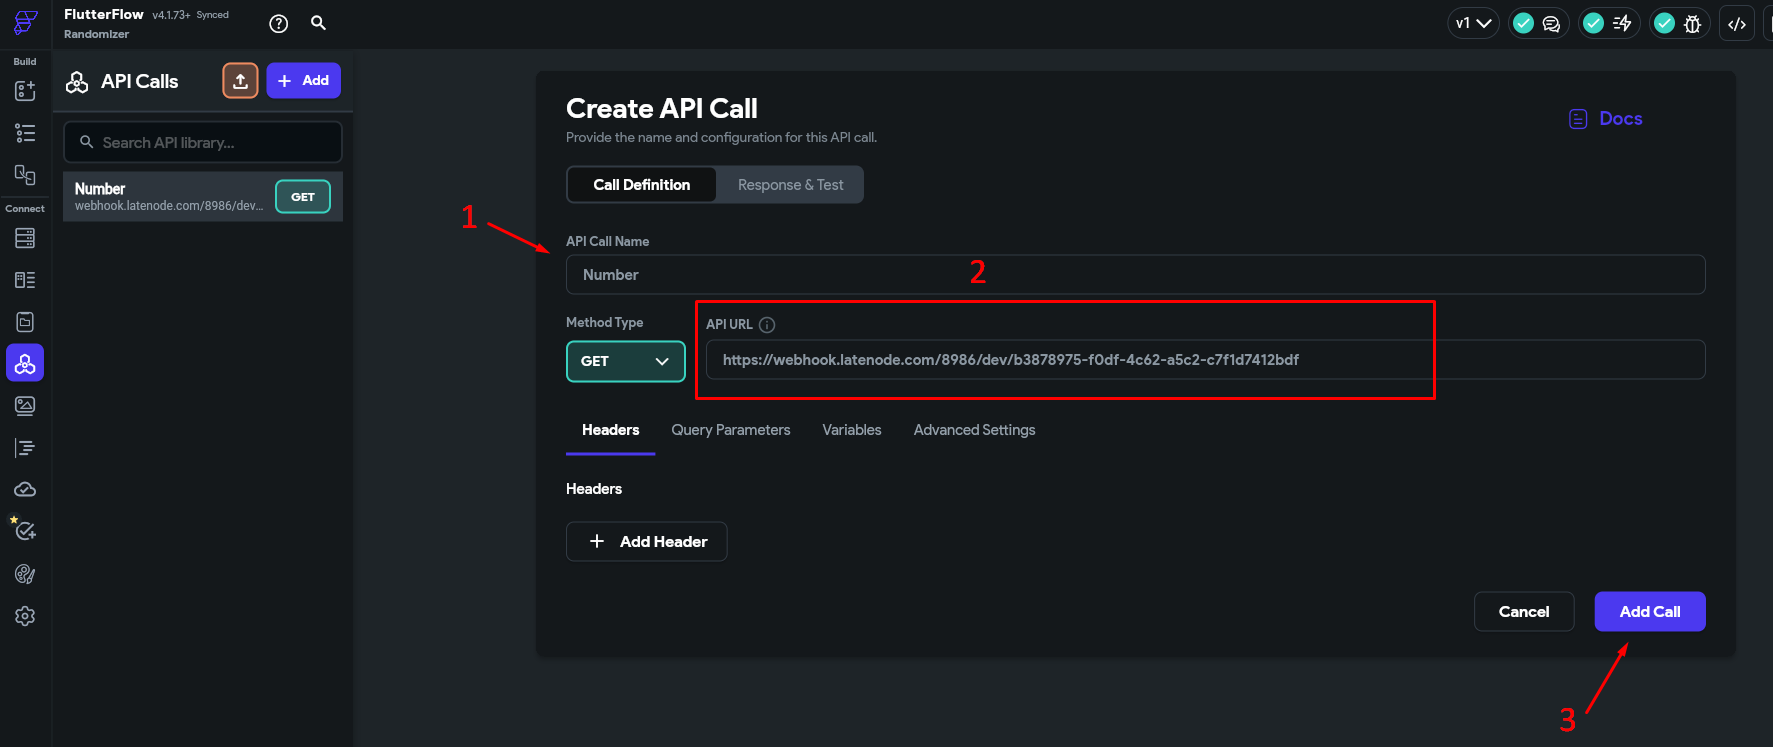
- Name the call (1), add the Trigger on Webhook (2) node address, and click Add Call (3).
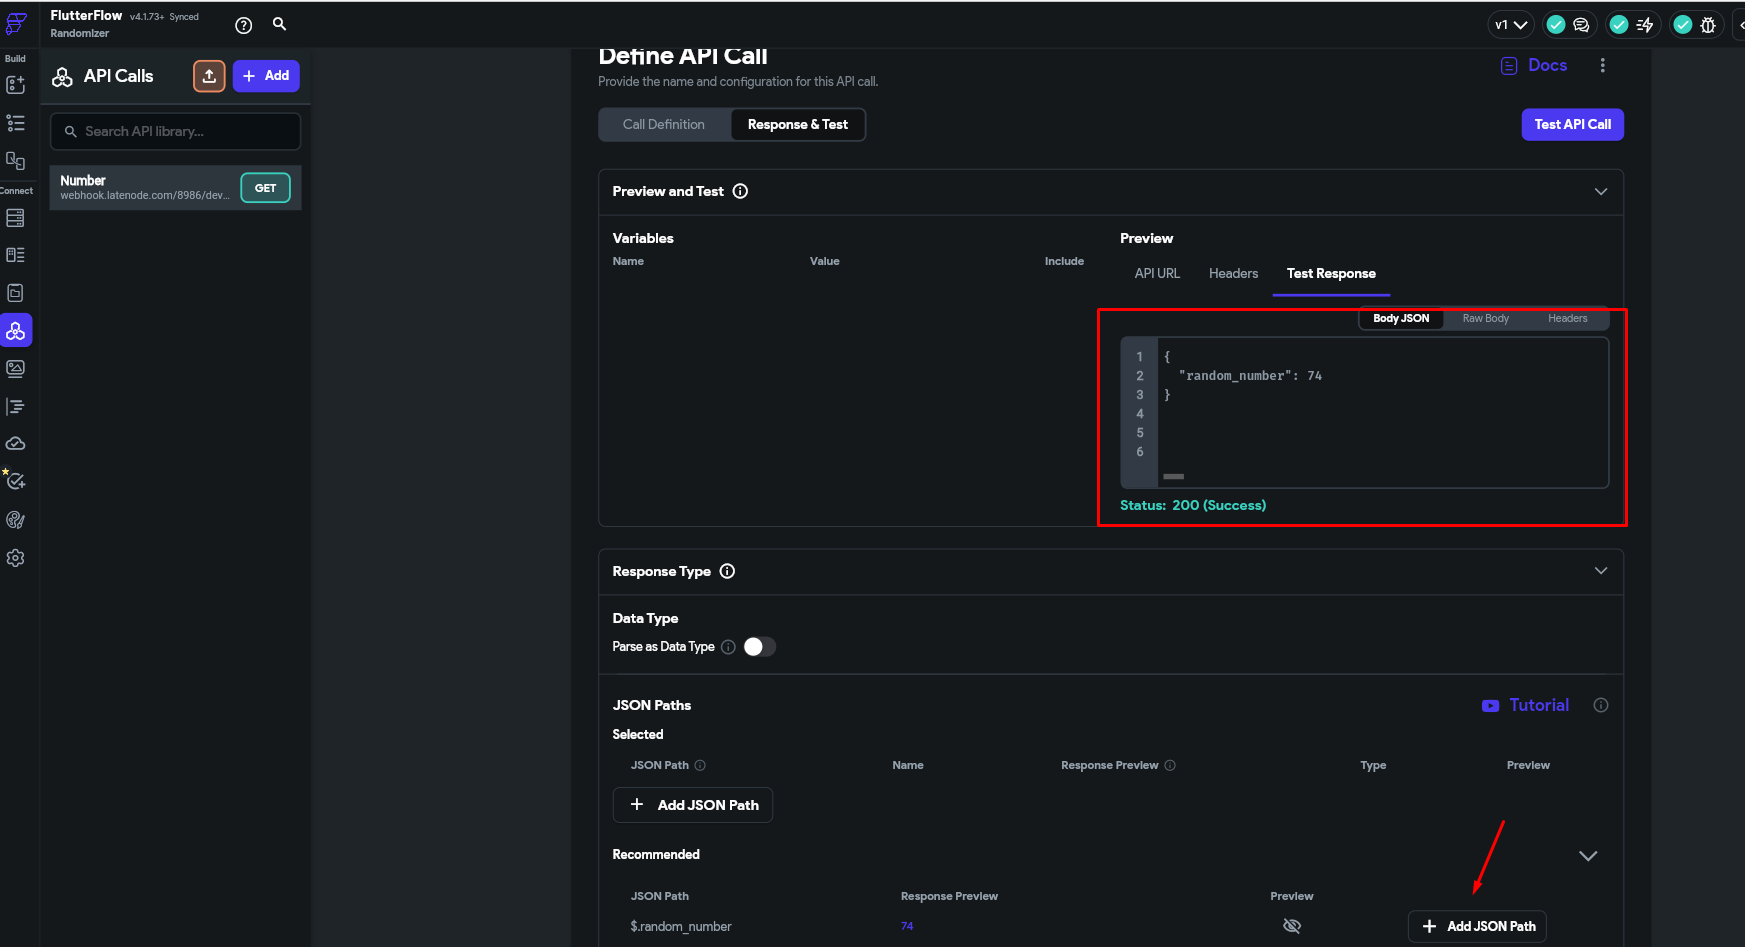
Testing
- Run once the scenario on Latenode.
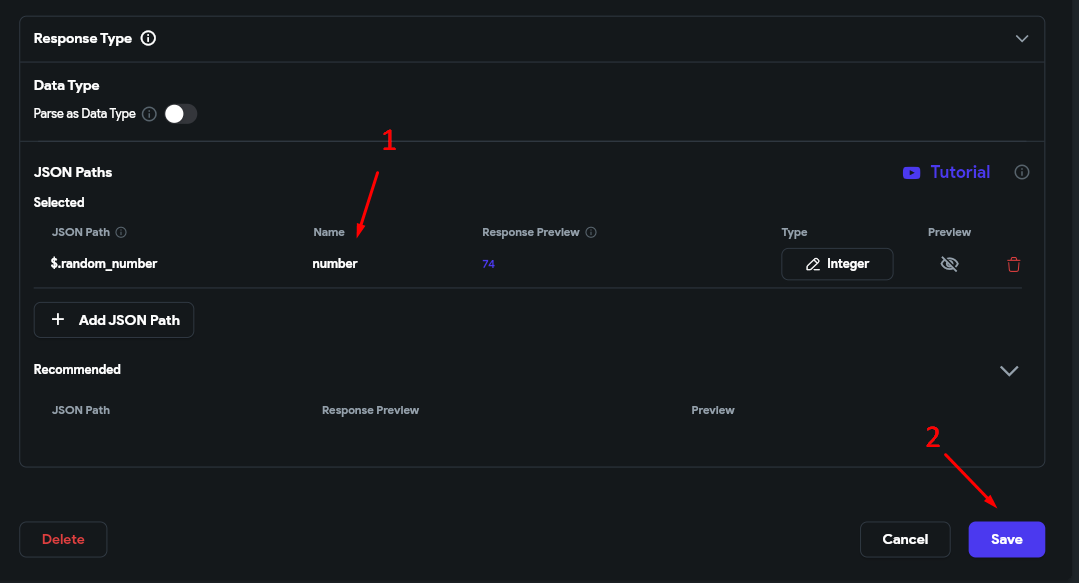
- In the Response & Test tab, click "Test API Call" and view the results. For the output parameter
number, click Add JSON Path, name it (1), and save (2).
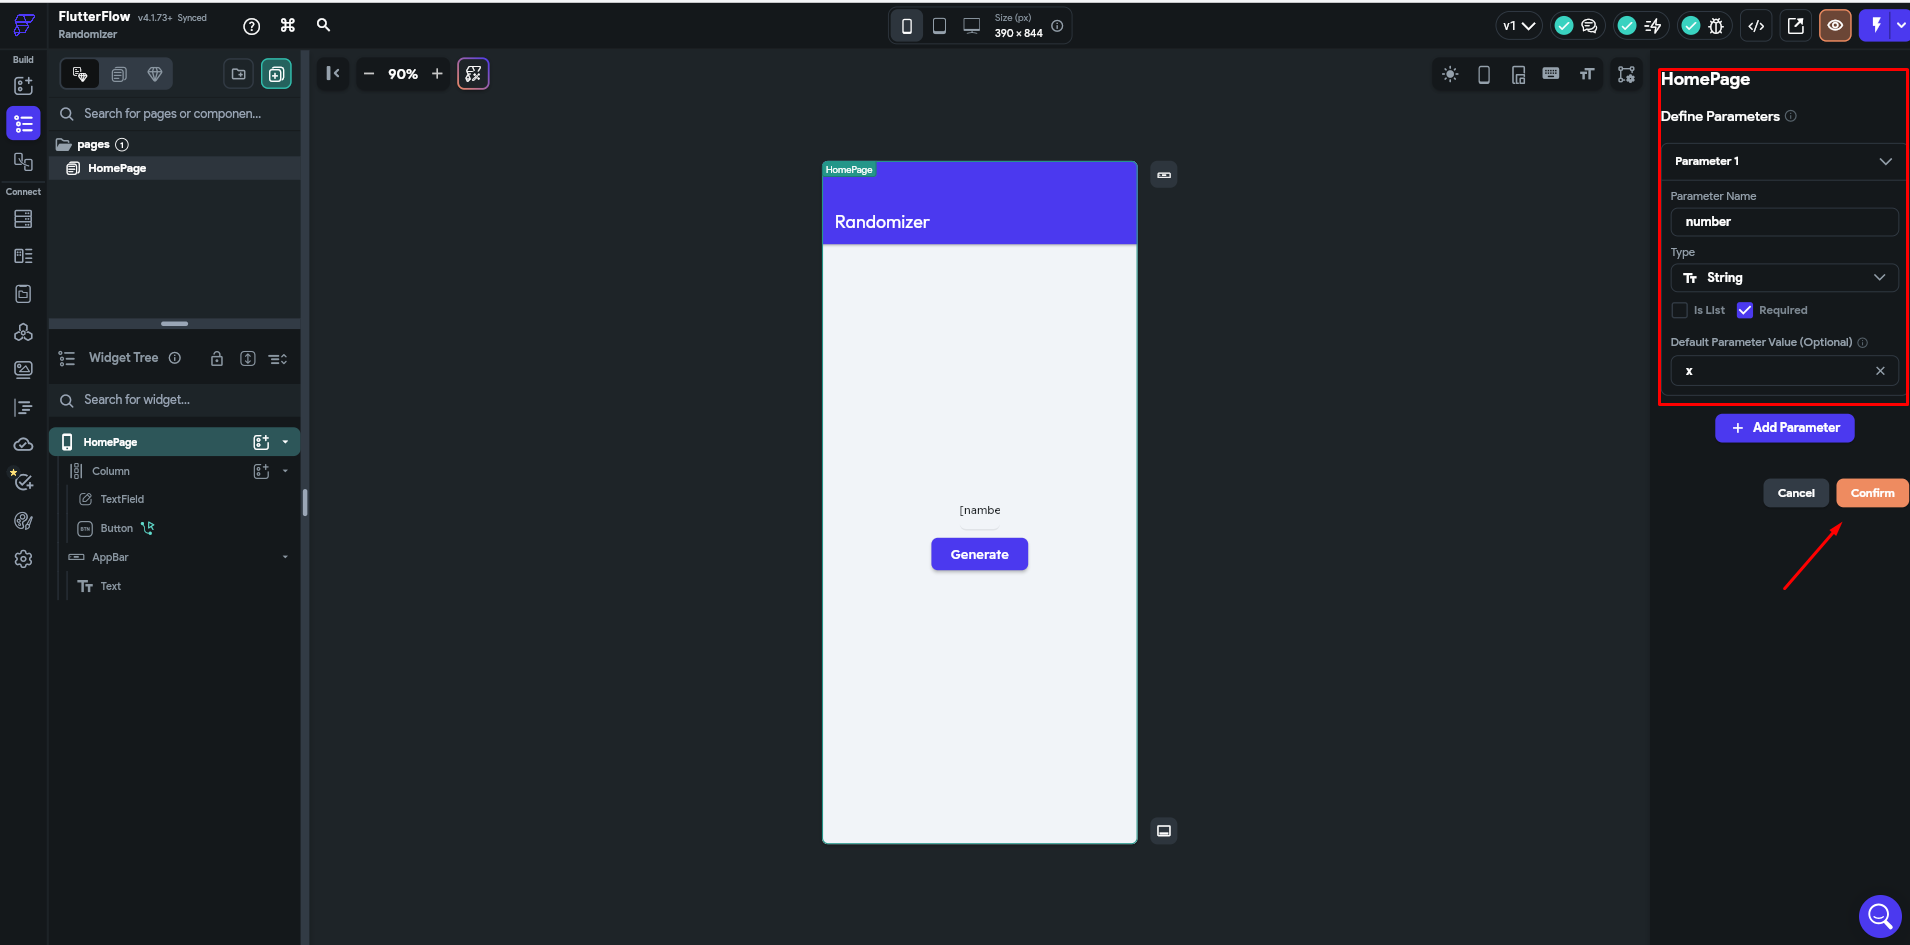
- Return to the Widget Tree (1) tab and click Add parameter (2).
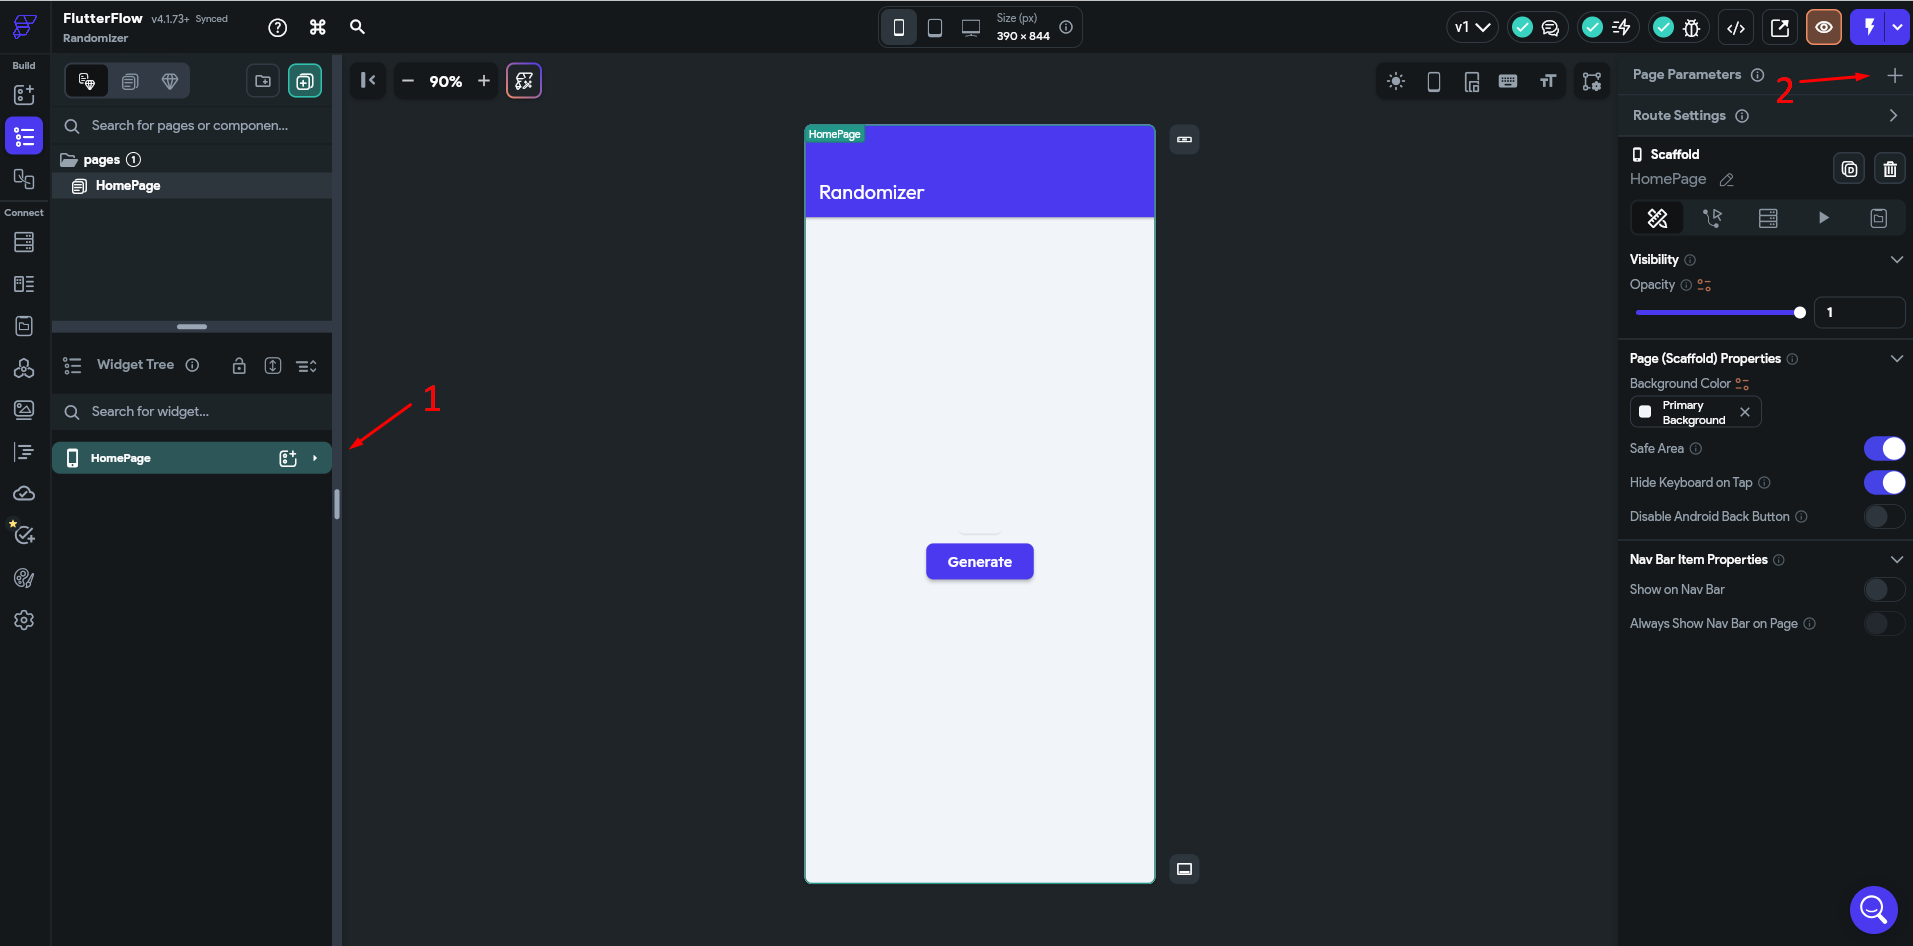
- Add a string parameter
numberand click Confirm.
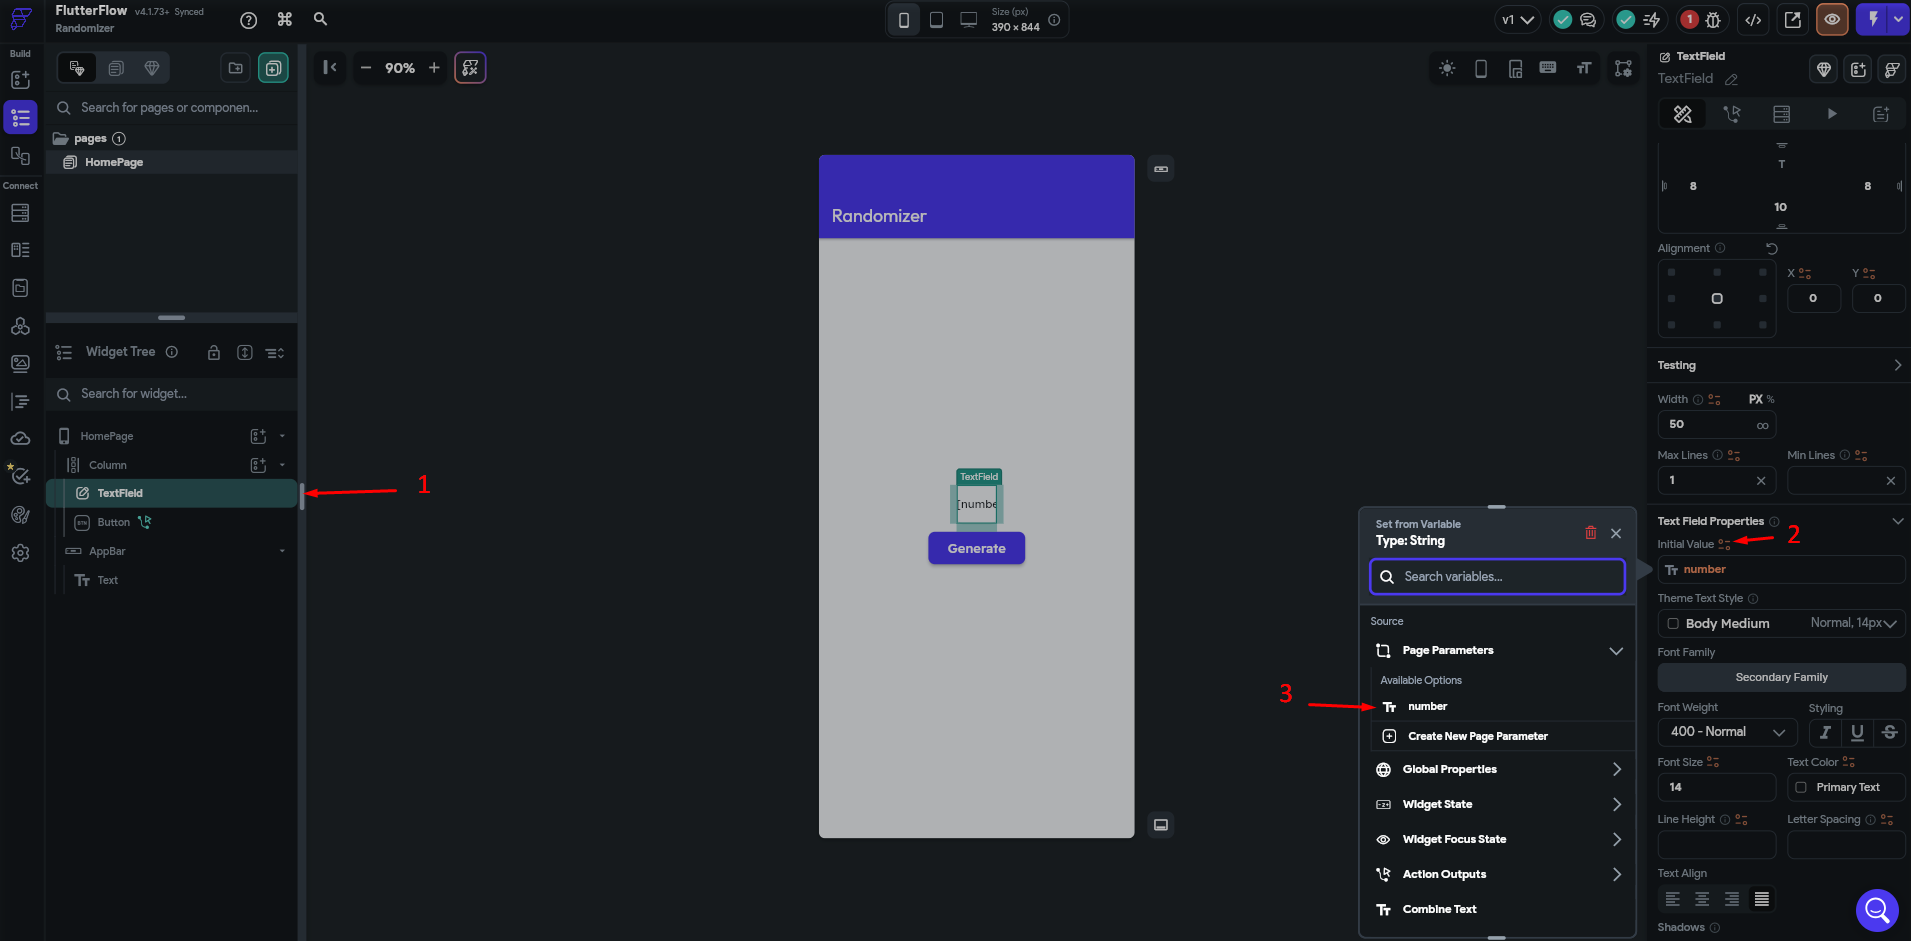
- For the TextField (1) element, set the Initial Value (2) to the
number(3).
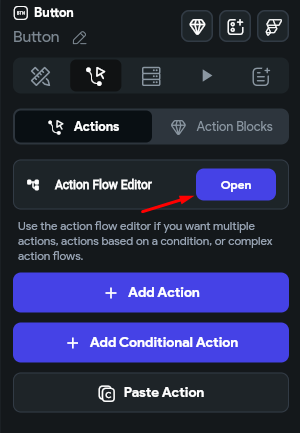
- For the Button (1) element, go to the Action section (2).
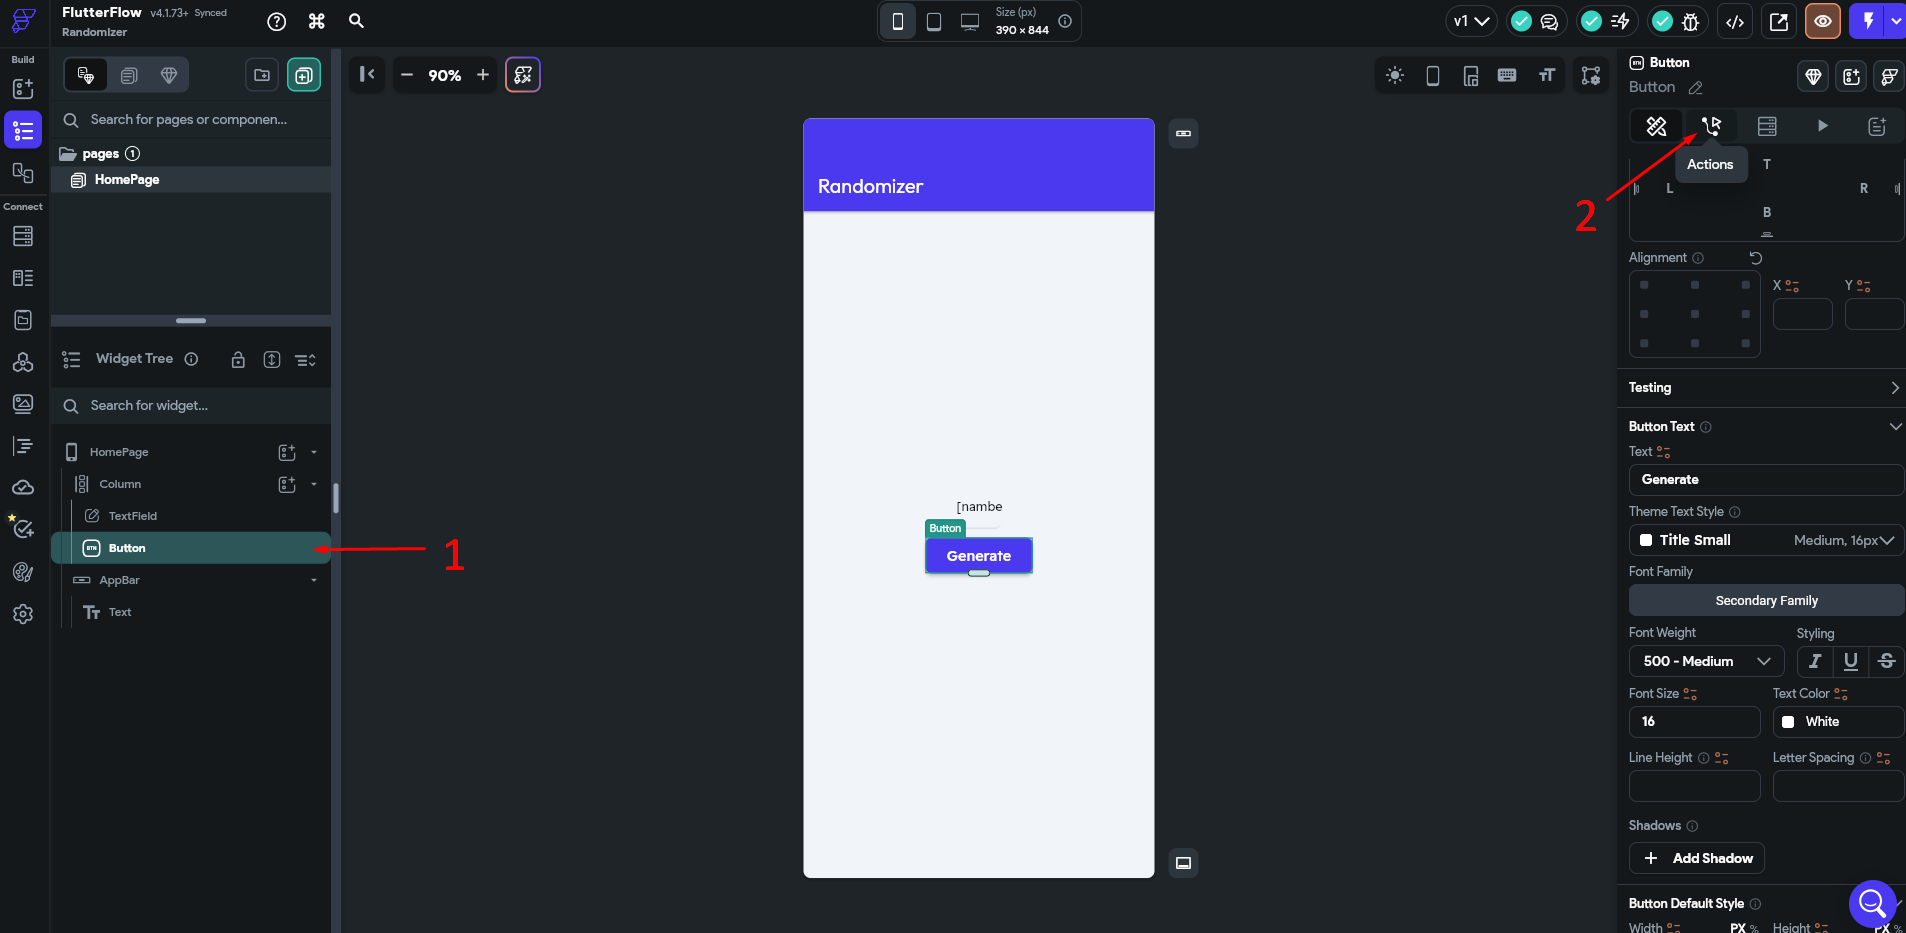
- Open the Action Flow Editor and add an action to call the configured API, so the request is sent to Latenode when the button is clicked. Change the output parameter name of the first action as needed.
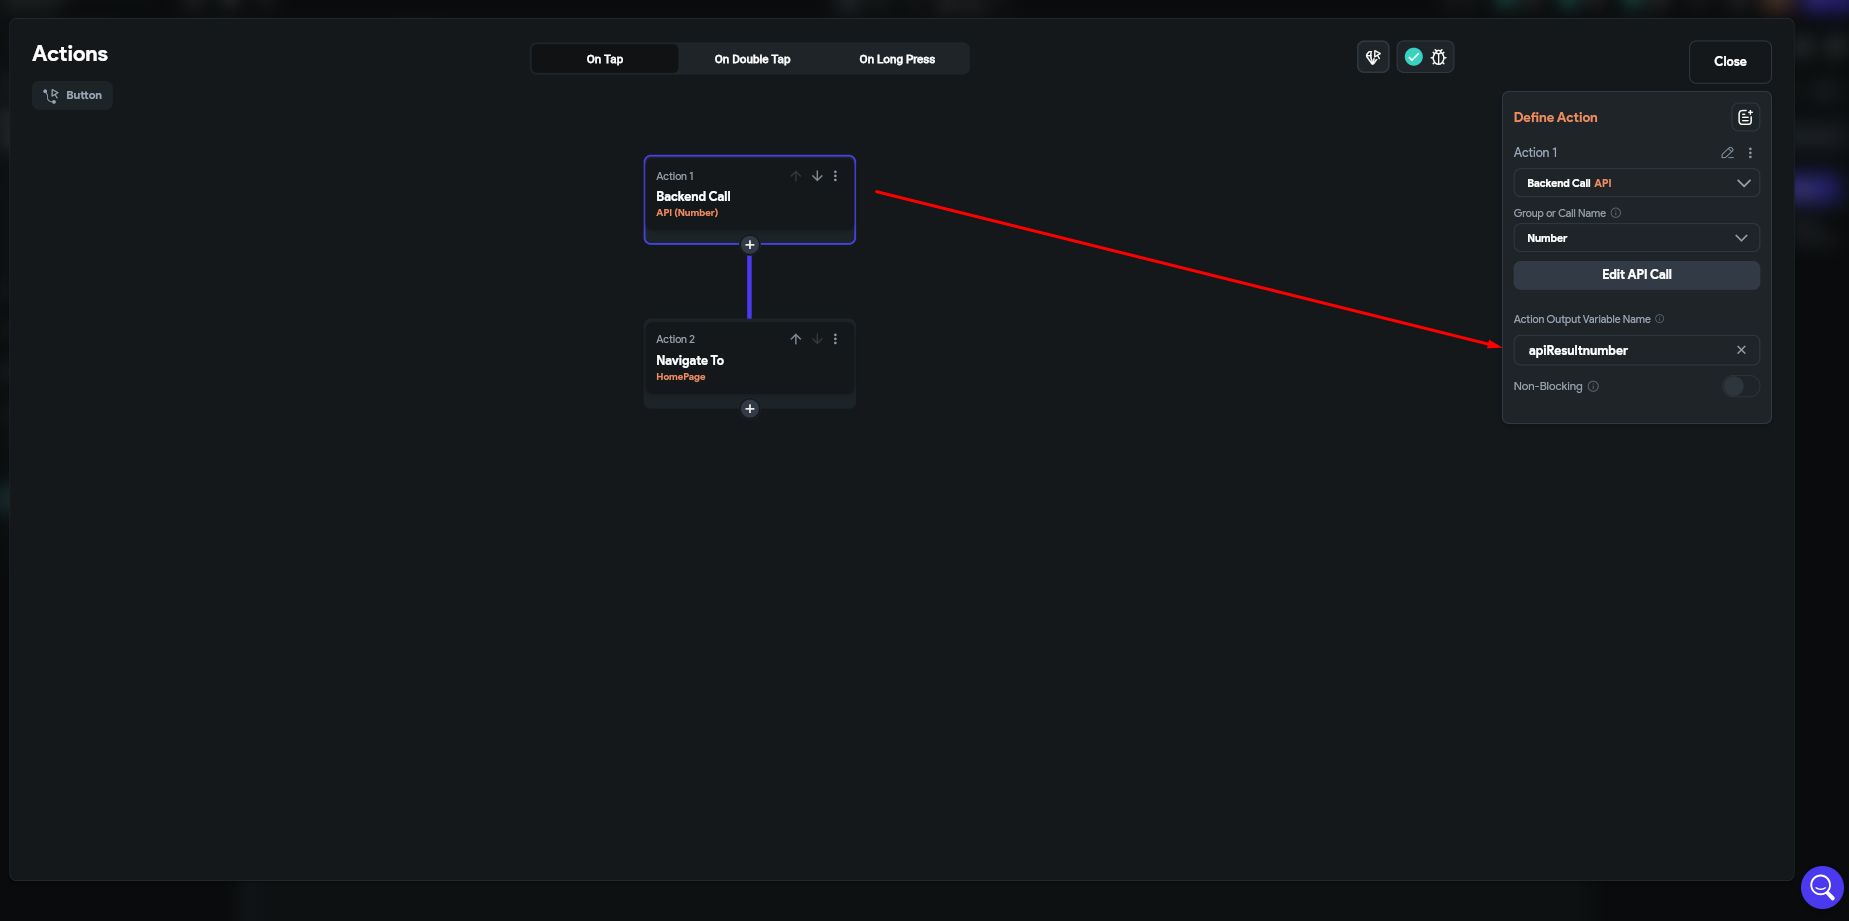
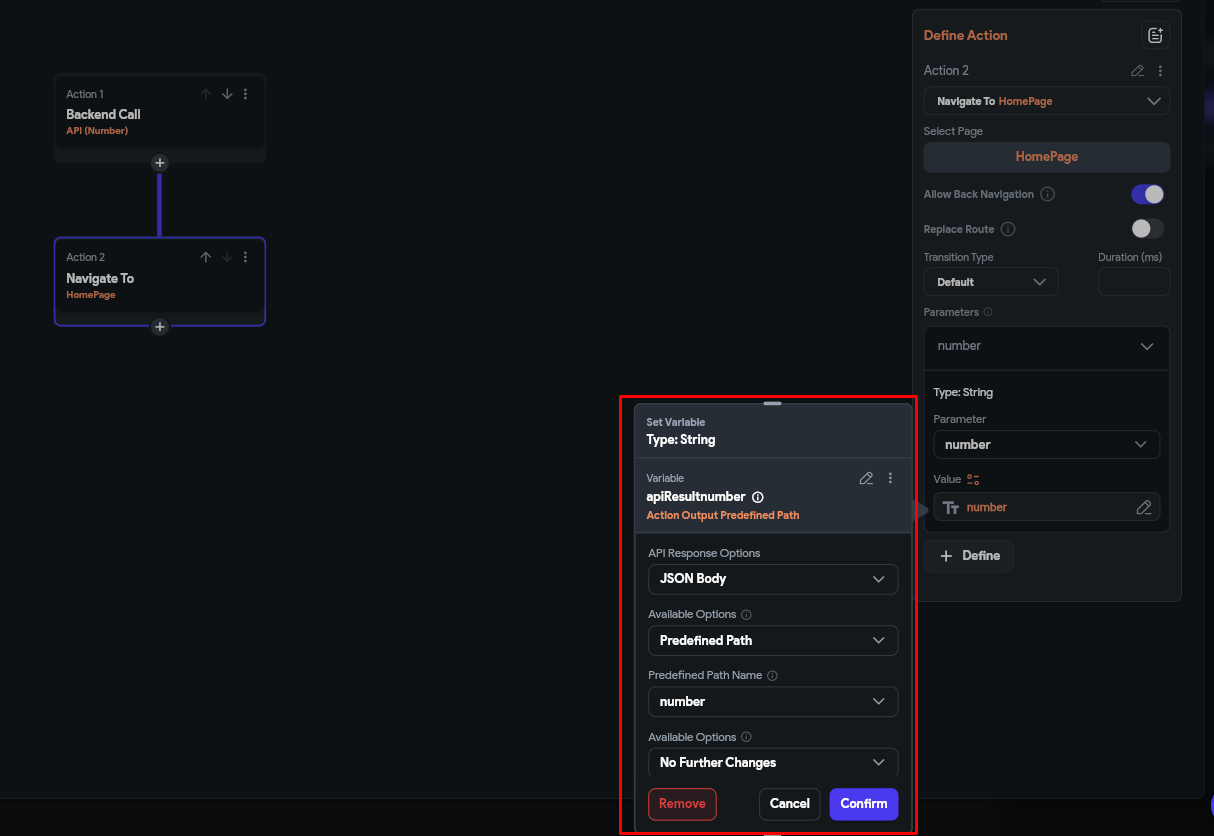
- Add an action to pass the response to the
numberparameter.
Testing the Created Scenario and Flutterflow Form
- Click the application launch button.
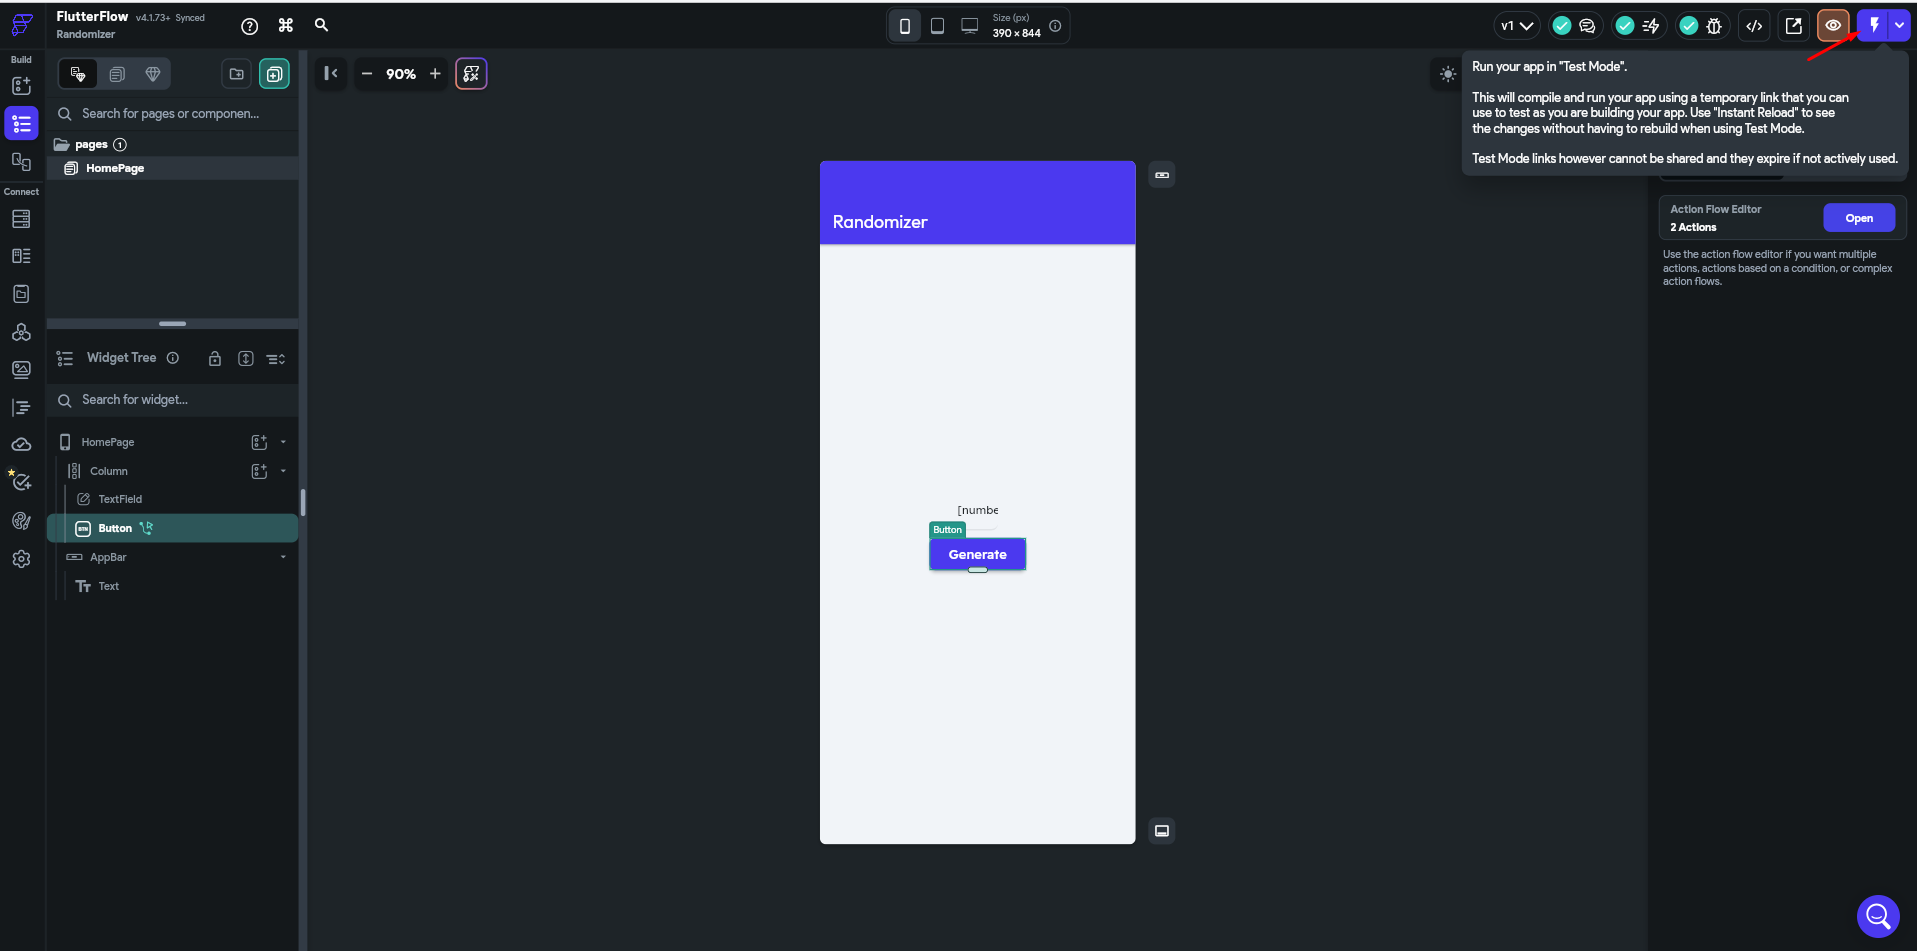
- Run once the scenario on the Latenode platform.
- Click the Generate button and view the random number generated by Latenode.
Fireflies.ai
Automating tasks with Fireflies.ai integration.
Framer
Automating design workflows in Framer.
Need Help? Ask the community
If something on this page is missing or unclear, post on the Latenode community forum. Our team and other users usually reply quickly.
0/100
0/2000